
You may wonder if buying or making a wreath is cheaper. Mmmh, an excellent question to ask yourself. Making your natural wreath is a wonderful and affordable way to bring Christmas happiness to your outdoor holiday decor.
If you do have a piece of land where you can harvest greenery, that is almost free, that’s even better lol! We’ll move our attention from their historical background to the practical side of the festive spirit: the delight of making a handcrafted Christmas wreath.
Accepting the ease of making your own wreaths gives your holiday décor a personalized touch and a fun way to get friends and family together for an inspiring and touching project. Come to think of it, the popularity of wreaths has recently increased. Check out some of your neighbors’ front doors.
How do you make a simple Christmas wreath step-by-step
1. Gathering Materials

First thing at hand, have you gathered materials for your Christmas wreath?
Most of the materials include:
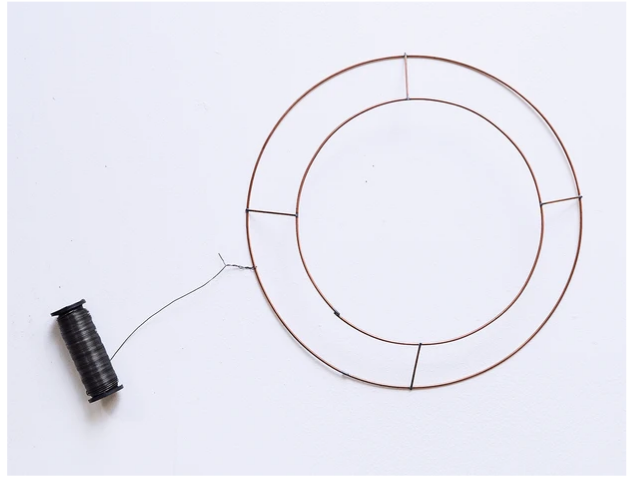
- wireframes,
- foam wreaths,
- straw wreaths,
- fake foliage,
- evergreen branches,
- green floral wire,
- scissors, and embellishments
Wireframes, foam wreaths, or straw wreaths can be used to create the wreath foundation. You may gather greenery from nearby tree farms, craft stores, or your own yard. To secure and make the ornaments tight and greenery to the foundation, green floral wire is a must. Nonetheless, to trim the greenery to appropriate lengths, use pruners or scissors.
You can choose decorations from nearby craft shops, nurseries, tree farms, or your own yard. It is possible to decrease waste and add thoughtful value by reusing and repurposing objects from prior years or you could just get creative.
2. Selecting Your Greenery and Decorations
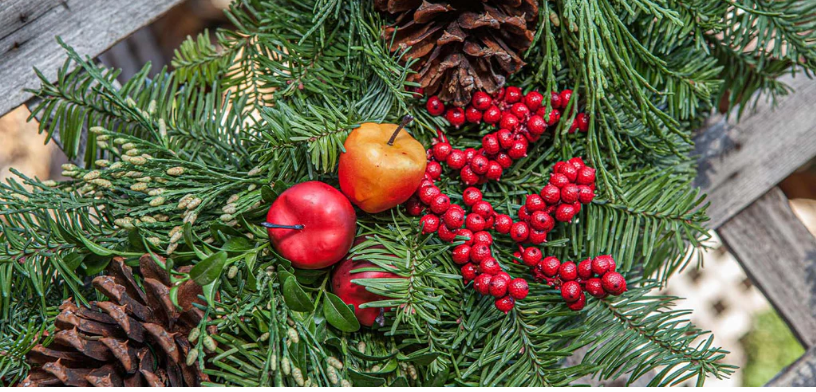
Search around gardens and woodland for items to decorate your Christmas wreath. Natural things like berries, twigs, seed heads, pine cones, and fir cones make excellent adornments, while greenery like holly and ivy add texture to the wreath base. Plan your wreath early enough and use dried flowers to add color and welcome guests into your home.
The typical Christmas feel is created by the long, delicate pine needles and the classic, exquisite fir branches. The rustic impression is enhanced by the flat needles of cedar trees.
Red berries and glossy foliage on holly branches represent the arrival of the Christmas season. Combine different types of foliage, choose ribbons, imitation berries, and pine cones. Let your decorations be both unique and in line with the holiday’s theme.
Weave the pine branches through the rubber bands. Ok, it feels more like shoving the pine branches through the rubber bands at times, but it gets the job done and keeps them in place. Make sure you weave a pine branch over the tape to cover it up! Moreover, make sure you have fun!
3. Preparing Your Workspace
Have you ever tried to do some task under no operational plan? What was your take and experience on it? Making preparations is very necessary for a successful simple Christmas wreath. The first steps in creating a good do-it-yourself project are to clear a large workspace, arrange supplies, assemble the required tools, and work in a location that receives plenty of natural light.
Clear clutter and organize necessities to create a clean workstation for your holiday creative projects. Make sure your place has enough lighting, comfy chairs, protective covers, and inspiration. Keep items at easy reach and add personal touches for a cheerful atmosphere. You know how your mood can tend to be so get a cheerful atmosphere.
Get a refilling and refreshment station and ensure that instruments such as scissors and hot glue are used properly. Keep a modest first-aid kit available in case of an emergency. To keep your work area orderly, add candles or favorite holiday mugs. When utilizing tools, keep safety precautions in mind.
4. Creating the Wreath Base
Having in hand your desired wreath foundation (wireframe, straw, foam, etc.), place it on a sanitized surface. Trim the extra leaves from the greenery, cut them into manageable portions, and use floral wire to bind the sections to the base. To give the portions a rich, complete appearance, cover them with floral wire.
As you go around the wreath, make consistent layering. Make sure that greenery covers the base to hide it. Trim and reinforce any spots that require more support. Lastly, hang or hold the wreath to assess its balance and form, then make any necessary final modifications to get the desired appearance.
Moreover, one roll can produce a lot of wreath frames and is a great material to have on hand for various projects. Open the roll, measure the circumference of the wreath you want to build, and unwind enough wire to form a circle, wrapping it around itself 2-3 times.
5. Adding Greenery

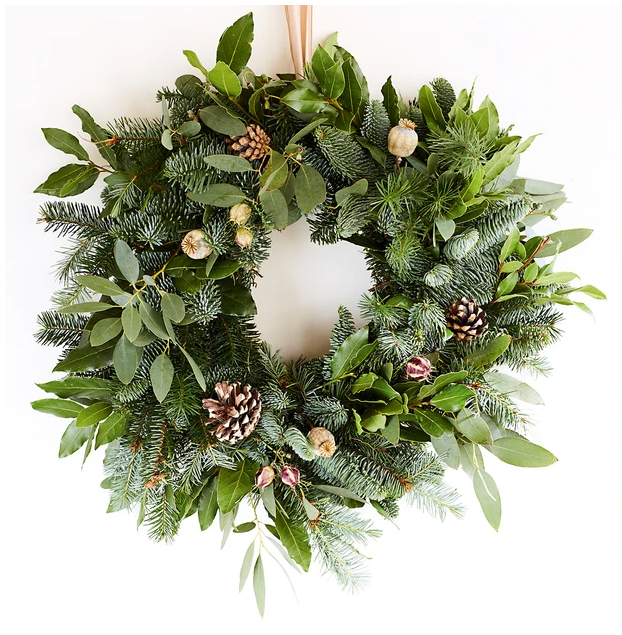
To give depth and interest to a wreath, progressively add layers of foliage over the foundation layer. Combine several kinds of greenery to create a dynamic effect. Attach greenery in various orientations to create a more organic look. A well-balanced design should take focus points and equitable distribution into account.
Use methods like floral wire, wrapping, bundling, and revolving the wreath to attach the foliage. Start small, gradually increase the size, keep symmetry, and then take a step back to evaluate the final look.
Also, don’t forget to “fluff” the greenery before placing it in the wreath so that your wreath won’t be flat and one-dimensional.
6. Adding Finishing Touches

This is the part where we are almost saying goodbye to the creative part work. It is such a shame but the work is evident and worth it. Select a ribbon that goes well with the theme and color palette of your wreath. Form a bow, tuck it in, and fasten it to the wreath.
Arrange the bow, add lights, berries, pine cones, baubles, decorations, individualized touches, dried flowers, fruits, or clusters of holly. Choose a Christmas theme for your decor and make any necessary tweaks. After tying off any loose ends, hang the wreath to admire its elegance.
Whether you prefer colorful festive flair or timeless elegance, make the most of it with a Christmas mantel using ornaments, garlands, string lights, stockings, and more, regardless of your style or budget.
7. Displaying Your Wreath
As you stand to put up your beautiful wreath art, you may wonder and ask yourself how are you to put it up. Moreover, does it grace your door and find a special place in your home? Well, just don’t overthink it anymore, I will always have your back!
A wreath is a beautiful way to greet visitors to your house, and it’s not only for the major holidays. Put the hook on the inside of your door, upside down. Next, create a loop at one end of the rope, twine, or thread and secure it around the hook. The other end of the rope should be tied around a portion of the wreath and left hanging when you pull it up and over the door onto the outside side.
For extra protection against inclement weather, coat your wreath with a transparent spray sealer. Store it inside or in a covered place when there is a lot of rain or snow. Examine and fix any damage on a regular basis, keep out of direct sunlight, use floral wire or hot glue to fasten attachments, and think about getting an outside wreath cover or bag.
8. Maintenance and Storage

Check your wreath frequently for loose parts, mist it to revive the aroma, brush it off, keep it out of direct sunlight, turn it around, and swap out old ornaments. Label the wreath with its contents and assembly instructions, store it in a cool, dry location, and, if needed, consider disassembly.
Because attics and basements can experience drastic temperature swings, store them in a closet or other temperature-controlled space. Reuse the original packaging if your wreath came with it so you can store it and keep it in good condition throughout the off-season.
Before keeping, give the wreath a thorough cleaning and inspection. For fresh leaves, use a plastic bag that can be sealed.
Conclusion
Making a beautiful natural Christmas wreath is not only a fun and inexpensive DIY project, but it also brings a touch of nature sense and beauty to your house throughout the holiday season.
Allow the scent of evergreen to permeate your room and let the delights of the holidays be captured by sparkling lights or colorful ribbons. It’s a chance to take it slowly, enjoy the present, and feel the delight of creating something lovely by hand.
We’d love to hear about your wreath-making adventures and any interesting tips you’ve picked up along the way. Share your holiday masterpieces with friends and family on social media. The beauty of this ritual is found not only in the wreaths themselves, but also in the shared tales, memories, and traditions that they inspire. Get inspired and feel free.
Nevertheless, it would be quite amazing if you were to explore the world of wreath-making, add a festive touch to your surroundings, and experience the beauty of the Christmas season—whether you’re an experienced craftsman or a novice. May the love, creativity, and happiness that come from spreading the Christmas spirit be symbolized by your handcrafted wreath.