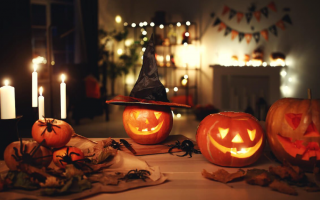
As the crisp October breeze rustles through the leaves, an undeniable magic always comes to life with the arrival of Halloween.
It is in this bewitching season that pumpkins take center stage, transforming into canvases for you to display your imagination.
But why settle for the ordinary way of doing things when you can create extraordinary Halloween pumpkin decorations that echo your unique spirit?
Let’s journey into the world of awesome artistry and unpack some ideas that would help you decorate your Halloween pumpkin into a captivating piece.
Choosing the Right Pumpkin
As Halloween approaches, people are always excited to transform their ordinary pumpkins into delightful and downright spooky works of art.
But before you dive into the world of pumpkin carving, there is one essential step that you need to be very careful with – choosing the right pumpkin.
Here are examples of some factors you should consider when selecting the ideal pumpkin that will bring your creative vision into reality:
- Size Matters:
When selecting your pumpkin for Halloween, you need to consider what your design idea is and the space where the pumpkin will be displayed.
More giant pumpkins offer enough space for complicated designs, while smaller ones are perfect for simpler carvings.
- Shape and Symmetry:
Make sure that you look for pumpkins with a flat base. An even shape makes carving It easier and ensures your pumpkin stands steadily without falling over.
- Surface Texture:
Smooth Halloween pumpkin skins are suitable for details, providing a clean canvas for your designs. Avoid pumpkins with bumpy textures If you plan on a complicated carving.
- Color Palette:
Consider the color of the pumpkin. Orange is a favorite, but white, green, or any other varieties can add a unique touch to your Halloween décor.
Choose a hue that complements your overall design scheme.
- Thickness of the Skin:
Thicker skins are sturdier and hold intricate designs better. Press the pumpkin’s surface gently; if it feels firm and doesn’t give too much, it’s likely to hold up well during carving.
- Freshness and Ripeness:
Opt for a fresh, vibrant pumpkin color and a sturdy stem. Avoid soft spots, bruises, or mold, as these indicate spoilage. A ripe pumpkin is easier to carve and will last longer.
- Your Carving Technique:
If you’re planning intricate designs, choose a pumpkin with a thinner skin. For simpler, bold designs, a thicker-skinned pumpkin works well.
Halloween Pumpkin Decorating Ideas To Try Out
While traditional carving holds its charm, exploring unique and no-carve pumpkin decorating ideas can add a touch of innovation to your spooky festivities.
Here, we present a treasure trove of fascinating Halloween pumpkin decorating ideas to captivate your imagination and elevate your holiday décor.
- Glittering Glamour Pumpkin:

Embrace the allure of sparkle by adorning your pumpkin with a glittering façade.
Begin by coating your pumpkin with adhesive, then generously sprinkle glitter, ensuring even coverage.
Allow it to dry, creating a captivating pumpkin that shimmers under Halloween moonlight. For a step-by-step tutorial, check out this tutorial.
- Mosaic Magic Pumpkin:

Transform your pumpkin into a mosaic masterpiece using colorful glass or ceramic tiles.
Apply adhesive directly onto the pumpkin’s surface and carefully arrange the tiles, creating intricate patterns and designs.
Once set, grout the spaces between the tiles for a polished finish. For detailed instructions, follow this tutorial.
- Painted Perfection Pumpkin:

Unleash your artistic flair by painting elaborate scenes or characters onto your pumpkin.
Start with a base coat, then let your creativity run wild with acrylic paints. From spooky haunted houses to adorable ghosts, the possibilities are endless.
Seal your artwork with a clear varnish for a long-lasting finish. Explore the art of pumpkin painting with this helpful tutorial.
- Nature’s Bounty Pumpkin:
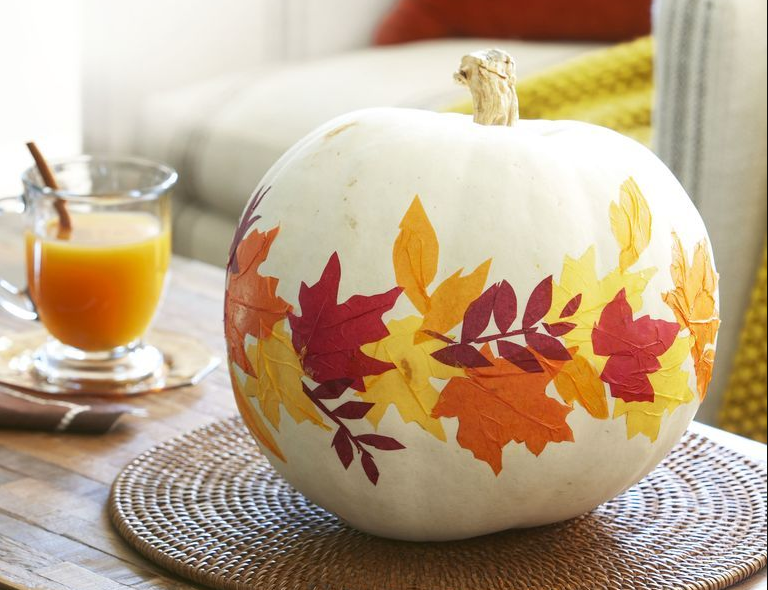
Take comfort in the beauty of autumn by covering your pumpkin with a few natural elements you can find around you.
Use hot glue to attach pinecones, acorns, dried leaves, or branches, creating an excellent collective blend of nature’s treasures.
This earthy pumpkin decoration will for sure add a touch of elegance to your Halloween display. Go to this tutorial to learn how to craft this organic piece.
- Enchanted Fairy Tale Pumpkin:
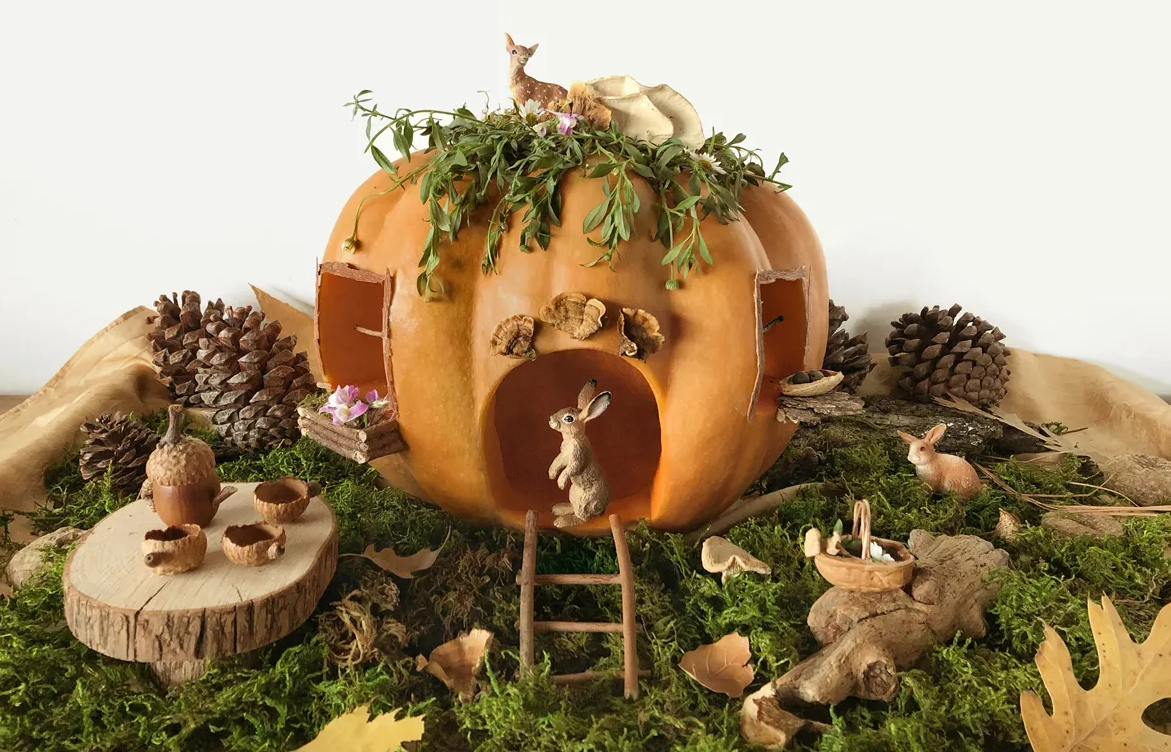
Bring your favorite fairy tale characters to life by crafting miniature scenes on your pumpkin.
You can use small moss and props to create creative worlds like enchanted forests or even magical castles.
It only involves arranging these elements on your pumpkin’s surface and securing them with hot glue for some spooky result.
To get this fairy tale pumpkin tutorial, go to this tutorial.
- Día de los Muertos Pumpkin:

Celebrate the beautiful traditions of Día de los Muertos by decorating your pumpkin in the style of Mexican sugar skulls.
Use vibrant colors and intricate patterns to paint a cheerful sugar skull design. For a festive touch, beautify the skull with flowers, beads, and sequins.
Follow this tutorial to create your Día de los Muertos pumpkin.
- Galaxy Glowing Pumpkin:

Transform your pumpkin into a mesmerizing galaxy using acrylic paints and glow-in-the-dark paint.
Start by painting a deep black base, then add swirls of vibrant colors reminiscent of cosmic wonders.
Once dry, apply glow-in-the-dark paint to certain areas, creating an otherworldly effect. Place your pumpkin under a light source during the day, and watch it illuminate the night with splendor.
Dive into the cosmos with this galaxy pumpkin tutorial.
- Zombie Apocalypse Pumpkin:

Capture the essence of a zombie apocalypse by transforming your pumpkin into a decaying undead creature.
Using sculpting clay creates gruesome facial features like sunken eyes, rotting flesh, and exposed bones. Paint the clay to achieve realistic textures and colors.
Add fake blood for a horrifying finishing touch. This spine-chilling pumpkin will haunt your Halloween night.
Learn the techniques for crafting a zombie pumpkin in this tutorial.
- Harvest Moon Pumpkin:

Emulate the beauty of the harvest moon by painting your pumpkin with serene night sky scenes.
Use shades of deep blue and black for the background, and add a glowing golden moon at the center.
Apply subtle touches of glitter to the moon to make it shine enchantingly. Stars, constellations, or silhouettes of trees can enhance the celestial ambiance.
Illuminate your autumn nights with this harvest moon pumpkin tutorial.
- Mummy-Inspired Pumpkin
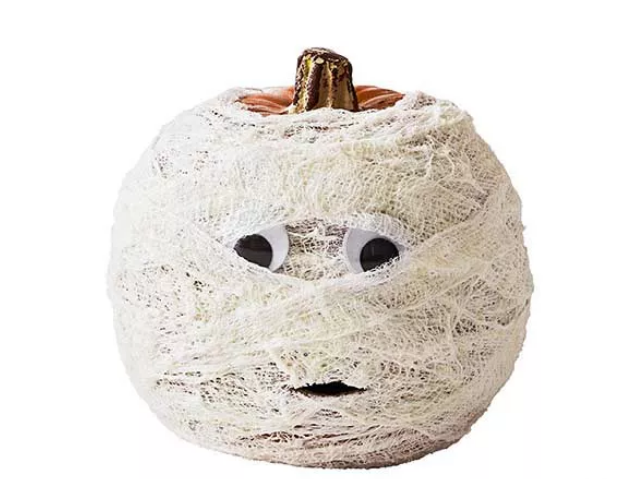
You can create a spooky mummy pumpkin using some covering, a few googly eyes, and a little bit of creativity.
Wrap the pumpkin with a bandage, leaving spaces for the eyes and sticking it with glue. Add googly eyes to complete the mummy look.
This no-carve idea is perfect for kids and adults alike. Get the tutorial for this piece here.
- Candy Corn-Inspired Pumpkin

Celebrate the sweet side of Halloween with a candy corn-themed pumpkin. Paint the pumpkin in white, orange, and yellow sections, mimicking the classic candy’s colors.
This cheerful design adds a pop of color to your Halloween decor. Get the complete tutorial for making a candy corn pumpkin.
- Unicorn Pumpkin
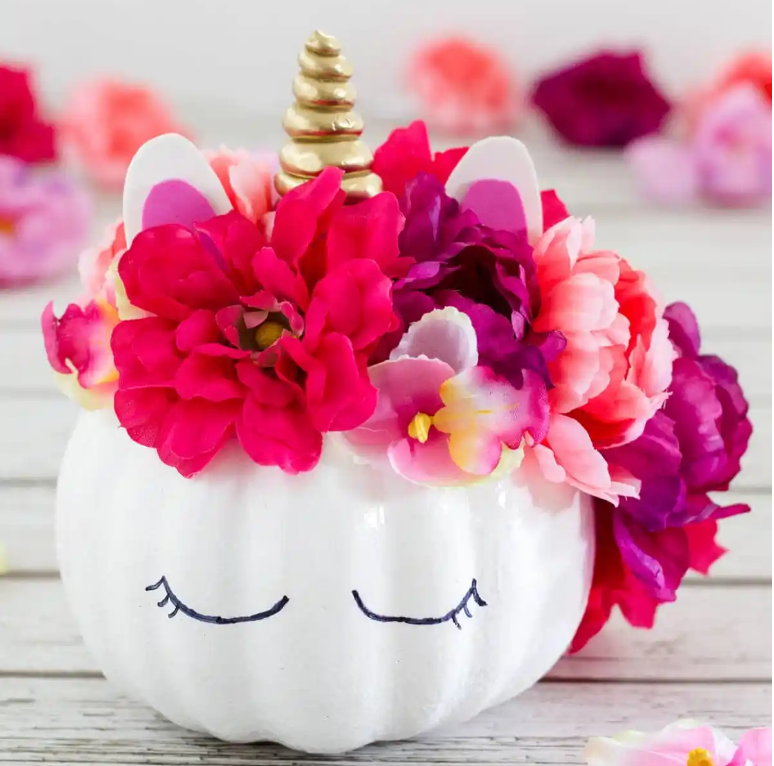
Unleash your inner unicorn lover by transforming your pumpkin into a magical unicorn. Paint the pumpkin with pastel colors, add a glittery horn, and create colorful paper ears.
Finish the look with expressive googly eyes. This whimsical creation is sure to enchant both kids and adults. Get a tutorial on how to make it in detail here.
- Witch Hat Pumpkin
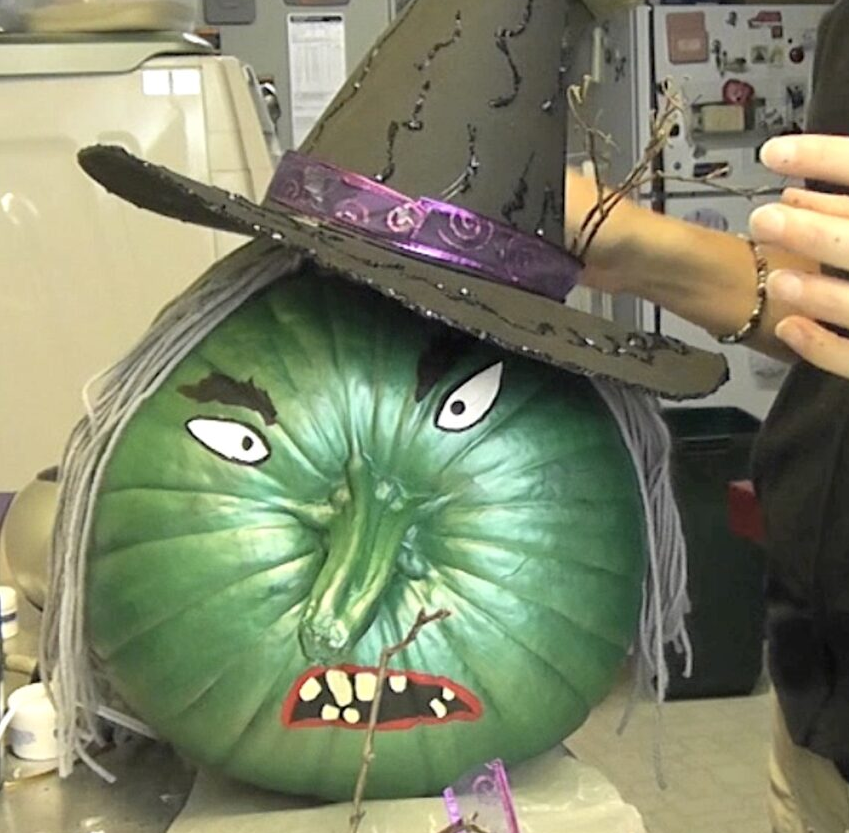
Embrace the wickedly delightful side of Halloween with a witch-hat pumpkin. Paint the pumpkin in a spooky hue, like black or dark purple.
Then, craft a miniature witch hat using felt or cardstock and secure it to the pumpkin. Add a faux spider for an extra eerie touch.
Get a tutorial on how to make it in detail here.
- Spiderweb Pumpkin

Give your pumpkin a creepy-crawly makeover by painting it in a dark shade and adding spiderweb designs using white paint or white yarn.
Place plastic spiders around the web to complete the eerie scene. This spooky pumpkin is perfect for Halloween night.
Get a tutorial on how to make it in detail here.
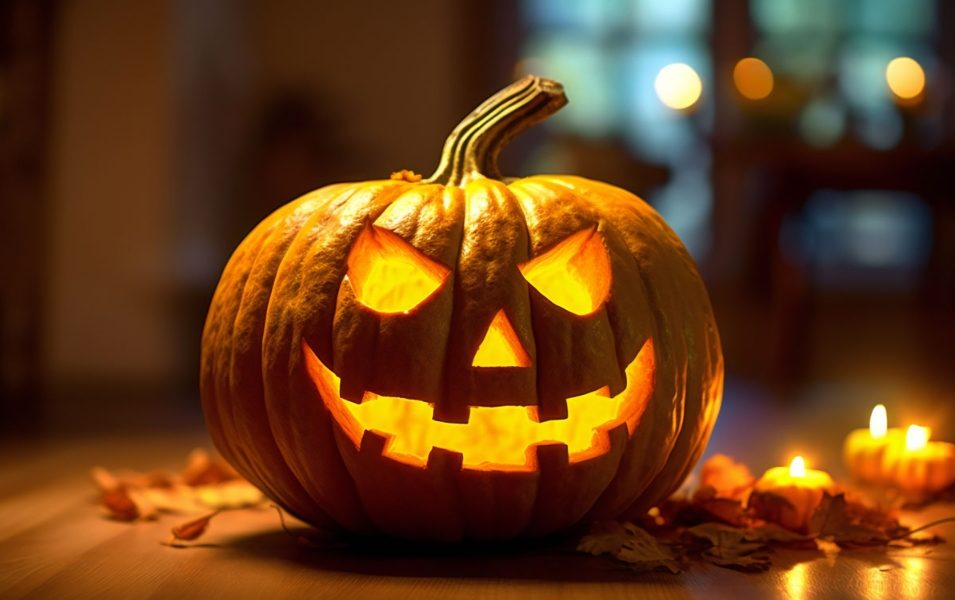
- Jack-O’-Lantern Stack

Create a playful pumpkin family by stacking different-sized pumpkins and decorating them as jack-o’-lanterns.
Paint expressive faces on each pumpkin and secure them together with dowel rods. This cheerful display is a delightful addition to your Halloween decorations.
Get a tutorial on how to make it in detail here.
- Harry Potter-Inspired Pumpkin

Bring a touch of magic to your Halloween decor with a Harry Potter-themed pumpkin. Paint the pumpkin as a spellbook, add the Hogwarts crest, or recreate your favorite wizardry scene.
Harry Potter fans will adore this enchanting pumpkin. Get a tutorial on how to make it in detail here.
- Haunted House Pumpkin

Craft a spooky haunted house scene on your pumpkin. Using black paint, paint the pumpkin in a dark shade and add windows, doors, ghosts, and eerie trees.
Illuminate it with a tea light to cast eerie shadows. This pumpkin captures the essence of a haunted Halloween night.
Get a tutorial on how to make it in detail here.
Preserving Your Decorated Pumpkin
Tips to make your pumpkin last longer
Preserving your Halloween pumpkin masterpiece requires a combination of careful selection, proper preparation, and ongoing maintenance.
You can extend your pumpkin’s lifespan with the proper techniques, ensuring it stays fresh and vibrant for weeks. Here are some valuable tips to make your pumpkin last longer:
- Choose the Right Pumpkin: Start by selecting a fresh, healthy pumpkin. Look for ones with firm, unblemished skin and a sturdy stem. A ripe pumpkin will sound hollow when tapped.
- Delay Carving: If possible, postpone carving until Halloween. Carving exposes the pumpkin’s flesh to air, accelerating the decaying process. Un-carved pumpkins last significantly longer.
- Clean Thoroughly: Clean the pumpkin inside and out before carving. Remove seeds, pulp, and any remaining stringy bits. Use a mild bleach solution (1 tablespoon of bleach per gallon of water) to disinfect the pumpkin and deter mold growth.
- Preserve with Petroleum Jelly: Add petroleum jelly to the cut edges after carving your pumpkin. This creates a barrier, sealing in moisture and preventing dehydration. Reapply the jelly every few days or when you notice the edges drying out.
- Hydrate Regularly: Pumpkins lose moisture quickly, leading to shriveling and wilting. Keep your pumpkin hydrated by spraying it with water daily. Alternatively, soak it in a bucket of water for a few hours to replenish lost moisture.
- Use a Pumpkin Preservative: Commercial pumpkin preservatives contain ingredients that slow down decay. Follow the instructions on the label to ensure practical preservation.
- Keep it Cool: Pumpkins last longer in cooler temperatures. If you live in a warm climate, store your pumpkin in the refrigerator during the daytime to slow down the decaying process. Just be sure to bring it out for display in the evenings.
- Avoid Sunlight: Direct sunlight can speed up the rotting process. Place your pumpkin in a shaded area during the day to protect it from harsh sunlight and extreme temperatures.
- Elevate Your Pumpkin: Sitting your pumpkin directly on damp ground can encourage mold growth and accelerate decay. Place your pumpkin on a dry surface, like a wooden board or a piece of cardboard, to keep it away from moisture.
- Embrace the Cold: If you live in a colder climate, your pumpkin might benefit from the chill. Cold temperatures can slow down the decay process. However, if it freezes, the texture might become mushy once it thaws, so be cautious.
- Rehydrate with Soaking: If your pumpkin starts to wither, give it a second chance by soaking it in water for a few hours. This can rehydrate the pumpkin and restore some of its firmness.
- Consider a Pumpkin Preservative Spray: Pumpkin preservative sprays are specifically designed to extend the life of carved pumpkins. They contain fungicides and other substances that inhibit mold and bacterial growth. Spray your pumpkin both inside and out with the spray, following the instructions as on the label.
How to protect it from mold and pests
Protecting your Halloween pumpkin from mold and pests is critical to ensure that it remains fresh and attractive throughout the Halloween season.
Here is how you can protect your pumpkin against these common issues:
- Choose a Healthy Pumpkin:
Start by selecting a fresh and healthy pumpkin. Before getting it, you need to inspect the pumpkin you buy for any signs of mold or damage. A pumpkin without any problems on its skin is less likely to develop mold.
- Clean and Disinfect:
Before starting to decorate your pumpkin, you must thoroughly clean the inside and outside of the pumpkin. Ensure that you remove all seeds, pulp, and stringy bits.
You can choose to use a solution of one tablespoon of bleach per gallon of water to disinfect the pumpkin’s surface, as this helps kill bacteria.
- Seal Cut Edges:
After carving your pumpkin, it is important to seal off the edges that are cut with petroleum jelly or a pumpkin preserver that you could buy from the store.
This creates a protective shield, preventing moisture loss and not allowing mold to grow. Make sure that you reapply the sealant every few days or when you notice any drying.
- Avoid Moist Environments:
You need to keep your pumpkin in a dry environment. This is because moisture is a critical factor in mold development.
Elevate the pumpkin off the ground using a wooden board or cardboard, which will help prevent it from sitting on wet surfaces.
- Store in a Cool Place:
You need to store your pumpkin in a cool area with good airflow. Warm temperatures can be able to fasten the growth of mold and attract pests.
If you live in a warm climate, consider refrigerating the pumpkin during the day and bringing it out in the evenings.
- Use a Pumpkin Preservative Spray:
Consider buying a pumpkin preservative spray. These sprays often contain ingredients that prevent mold and pests from surviving. Ensure that you follow the instructions on the product label for best results.
- Keep it Shaded:
Protect your pumpkin from direct sunlight. Sunlight can speed up the decay process and put the pumpkin at risk of mold. Place it in a shaded place, especially during the day.
- Monitor Regularly:
Inspect your pumpkin regularly for any signs of mold growth or pests. Early detection allows for quick action to address the issue.
- Rehydrate When Needed:
If you notice your pumpkin starting to dry up, you can rehydrate it by putting it in a bucket of water for a few hours. This will help return some of its strength and slow down further dehydration.
- Remove Fallen Leaves and Debris:
Keep the area around your pumpkin clean by regularly removing fallen leaves. This is because these materials can become hiding spots for pests and trap moisture, contributing to mold growth.
- Apply Natural Repellants:
Consider using natural repellents to prevent pests from attacking your pumpkin. Sprinkle cinnamon, garlic powder, or pepper around the base of the pumpkin to discourage insects.
- Reapply Preservatives:
If you are using homemade or bought preservatives, reapply them according to the recommended instructions. This helps maintain the pumpkin’s freshness and prevents mold and pests.
Storing recommendations
Storing your Halloween pumpkin properly is essential to maintaining its freshness and prolonging its lifespan.
Here are some ways you can be able to ensure your pumpkin stays in good condition:
- Cool and Dry Location:
Store your pumpkin in a cool, dry place when it’s not on display. Avoid areas with direct sunlight, as heat can cause the pumpkin to dry up quickly.
- Elevate Off the Ground:
Place your pumpkin on a wooden board, piece of cardboard, or any dry surface to elevate it off the ground. This prevents the pumpkin from absorbing moisture from the surface, which can lead to mold growth.
- Avoid Freezing Temperatures:
While cooler temperatures are what is preferred, avoid putting your pumpkin to freezing temperatures. Freezing can cause the pumpkin’s texture to become mushy when it gets cold.
- Monitor Regularly:
Check the pumpkin regularly for signs of decay, mold, or pest infestation. If you notice any issues, address them quickly to prevent further changes.
- Use a Trash Bag or Plastic Wrap:
If you’re not showing off the pumpkin and want to keep it fresh for a longer time, wrap it in plastic wrap or place it inside a clean, dry trash bag. This helps retain water and prevents the pumpkin from drying out.
- Rehydrate When Necessary:
If the pumpkin starts to dry, you can rehydrate it by soaking it in water for a few hours. This can help restore some of its firmness.
- Be Mindful of Odors:
Pumpkins can absorb odors from their surroundings. Avoid storing them near strong-smelling items, such as chemicals, cleaning agents, or pungent foods.
- Remove Mold:
If you notice any mold developing on the pumpkin, remove it immediately. Wipe the affected area with a cloth soaked in water and vinegar to kill the mold spots.
- Use Preservatives:
Consider using a pumpkin preservative spray. These sprays can help you prevent mold from growing and keep the pumpkin fresh for longer. Ensure you follow the instructions on the product label for best results.
- Discard Decaying Parts:
If a portion of the pumpkin starts to decay, immediately cut off the affected part. Removing the decaying parts can prevent the spread of mold and extend the life of the rest of the pumpkin.
Conclusion
In the world of Halloween, pumpkins are not mere gourds but canvases for our creativity, embodiments of our spooky imaginations.
Through intricate carvings, vibrant paints, and innovative designs, we bring life to these humble vegetables, adorning our homes with some spooky charm.
Remember that as you delve into the art of pumpkin decoration, the true magic lies in your imagination. Let your creativity roam freely, carving out the night with your unique vision.
Consider including a personalized accessory that matches the season’s spirit to enhance your Halloween celebrations.
This personalized Halloween name necklace and this Halloween name ring are the perfect accompaniments to your creatively adorned pumpkins.
The pieces add a touch of charm to any Halloween outfit, making them ideal gifts for friends, family, or yourself.