As the holiday season approaches, one of the most heartwarming traditions is the act of giving and receiving gifts.
Wrapping a Christmas gift is more than just concealing the item; it’s an art that adds a touch of thoughtfulness and anticipation to the exchange.
Whether you’re a seasoned pro or a novice looking to improve your gift-wrapping skills, this guide will provide you with step-by-step instructions and tips to help you create beautifully wrapped presents that will delight your loved ones and add an extra layer of magic to the holiday festivities.
So, gather your supplies, unleash your creativity, and let’s embark on a journey to discover how to wrap Christmas gifts with style and flair.
The Materials You’ll Need
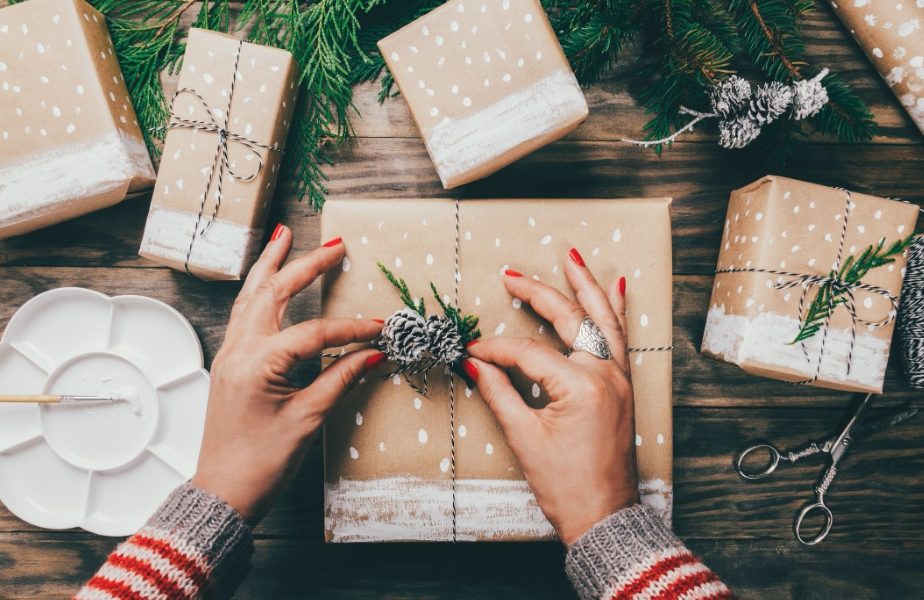
Materials play a crucial role in achieving the perfect gift wrap, enhancing both the aesthetics and presentation of your Christmas gifts.
To ensure you’re well-prepared for this creative endeavor, let’s begin by taking a closer look at the essential materials you’ll need:
- Wrapping Paper: The foundation of your gift wrap, choosing the right wrapping paper, sets the tone for your overall design. It comes in various colors, patterns, and finishes, allowing you to tailor your selection to match the recipient’s style or the holiday theme.
- Scissors: A good pair of sharp scissors is essential for cleanly cutting the wrapping paper and achieving neat edges. Blunt scissors can lead to uneven cuts and frustration.
- Tape: Transparent or double-sided tape is used to secure the wrapping paper in place. It should be strong enough to hold the paper together but not so sticky that it damages the paper when removed.
- Ribbon or Twine: Adding a ribbon or twine not only secures the wrapping but also adds a decorative touch. You can choose from a variety of colors, textures, and widths to complement your gift’s style.
- Gift Tags or Labels: Personalize your presents with gift tags or labels, providing a space to write the recipient’s name and a heartfelt message. This small addition adds a personal touch to your gift.
- Bow: A decorative bow can be the finishing touch that elevates your gift wrapping. Pre-made bows save time, or you can learn to create your own for a more customized look.
- Gift Box: For irregularly shaped items or delicate objects, consider placing them in a gift box before wrapping. This provides added protection and ensures a uniform, tidy appearance.
- Tissue Paper: Adding a layer of tissue paper inside the wrapping can enhance the presentation and protect the gift from prying eyes. Tissue paper comes in various colors to coordinate with your wrapping paper.
- Gift Bags: Gift bags are a convenient alternative to traditional wrapping and work well for items that are challenging to wrap neatly. They come in a range of sizes and designs.
- Stickers and Seals: These are perfect for adding a final decorative touch or for sealing envelopes when using gift cards or money.
- Ruler or Measuring Tape: Precise measurements are crucial for achieving clean, professional-looking wraps. A ruler or measuring tape helps you cut the right amount of wrapping paper.
- Pen or Marker: A marker or pen is used for writing messages on gift tags, labels, or directly on the wrapping paper. Choose a color that complements your overall design.
- Embellishments: Get creative with embellishments like glitter, stickers, or small ornaments to add extra flair to your wrapped gifts. These can be glued or attached to the wrapping paper.
- Bone Folder or Edge of a Credit Card: A bone folder or the edge of a credit card is an invaluable tool for achieving clean, precise creases and crisp edges on your wrapped gifts. A bone folder, typically made of smooth, polished bone or plastic, is purpose-built for this task and provides a high level of precision.
How to Wrap Christmas Gift Like A Pro
Wrapping a gift with precision and care not only protects its contents but also adds an extra layer of anticipation and delight to the act of giving and receiving.
This step-by-step guide will walk you through each aspect of the gift-wrapping process, ensuring that your presents are not only beautifully presented but also exude a professional touch that will leave your loved ones in awe.
From measuring and cutting wrapping paper to adding the finishing ribbon, these detailed instructions will transform your gift-wrapping skills, making your presents stand out during the holiday season.
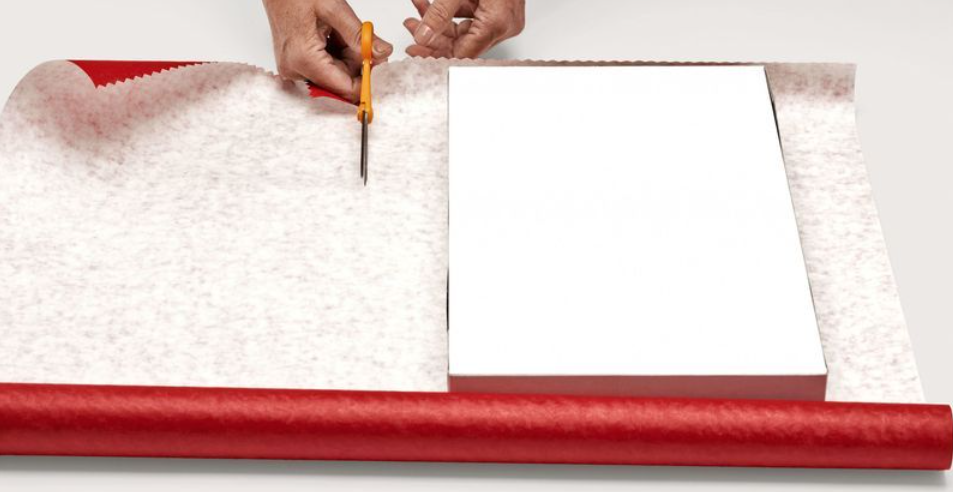
Step 1: Slice The Cover Paper
Begin your gift-wrapping journey by selecting an appropriate amount of wrapping paper.
This step is crucial because the correct measurement ensures a neat and appealing finish while cutting too much can result in wastage, and cutting too little can lead to an incomplete wrap.
If you’re dealing with a challenging shape or a more significant gift, it’s helpful to unroll the paper on a flat surface for an accurate measurement.
Take your time with this step to ensure that you have the right amount of paper to cover your gift while allowing for a slight overlap ultimately.
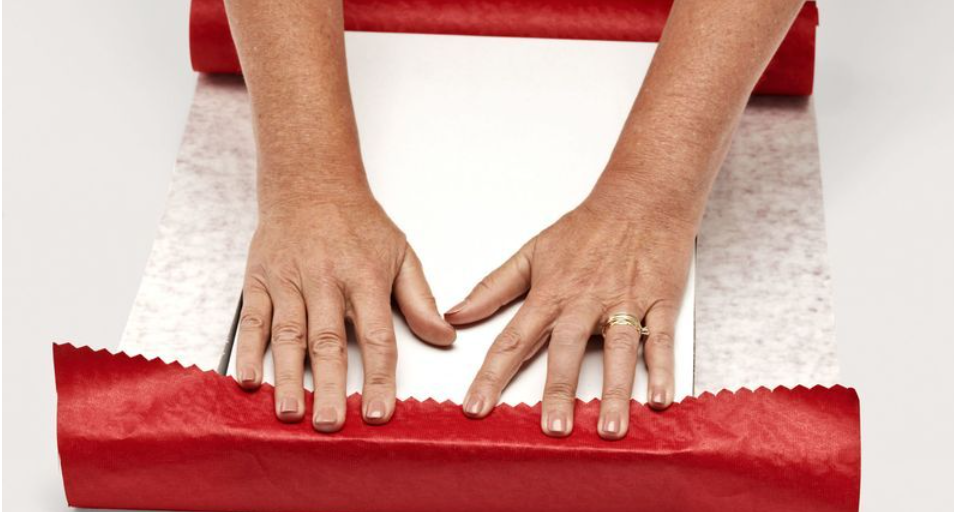
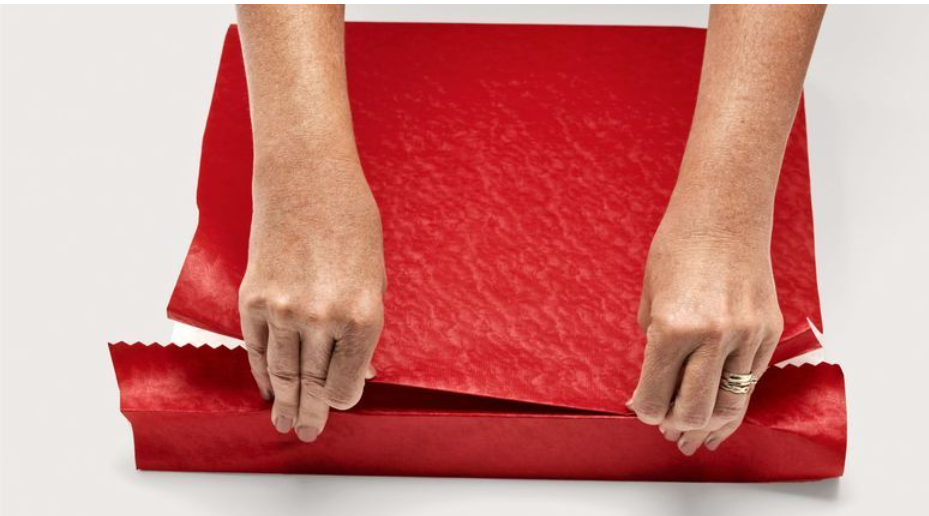
Step 2: Fold It
Begin with your prepared wrapping paper and center your gift neatly within it.
Pay close attention to the paper’s design, making sure that the patterned or solid side faces outward for an aesthetically pleasing presentation.
Now, take one side of the paper and fold it over the gift, taking extra care to ensure the edge aligns neatly with the opposite side.
To secure this side, discreetly apply tape; the tape must remain inconspicuous to preserve a clean and polished appearance, as it establishes the foundation of your gift wrap.
This meticulous attention to detail in these initial steps sets the stage for a beautifully presented Christmas gift that will impress and delight its recipient.
Step 3: Combine Ends
Continuing forward, fold the opposite side of the wrapping paper over your gift, allowing it to overlap the first side.
The central aim here is to ensure that the seam is positioned neatly in the middle of the gift, ultimately crafting a symmetrical and balanced appearance.
Employ tape to secure this seam in place, prioritizing a firm and orderly attachment.
This particular step is pivotal, as it revolves around attaining a seamlessly executed, wrinkle-free finish on the primary body of your gift.
Such precision ensures that your thoughtfully wrapped Christmas gift maintains an impeccable and visually pleasing presentation, ready to bring joy and anticipation to its recipient.
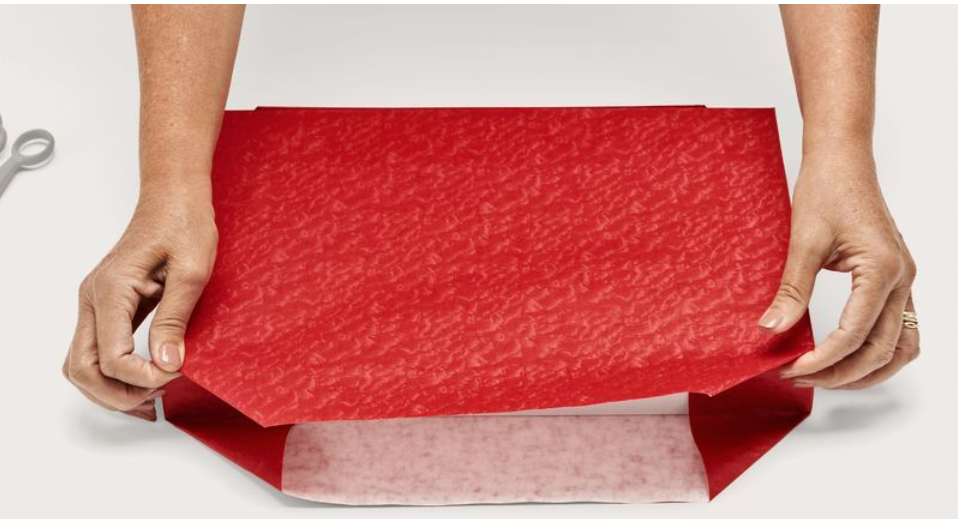
Step 4: Conceal Uncovered Ends
To proceed, rotate the wrapped gift so that the open ends are now facing you.
In pursuit of a clean and professional aesthetic, the next step is to fold down the top edge of one of the open ends, shaping it into a precise triangular flap.
It’s crucial to ensure this fold is exact and to secure it firmly in place with tape, ensuring it lays flat and tidy against the gift.
This particular fold plays a significant role in creating a refined and elegant presentation, further enhancing the overall appearance of your thoughtfully wrapped Christmas gift, making it a true delight to both give and receive during the holiday season.
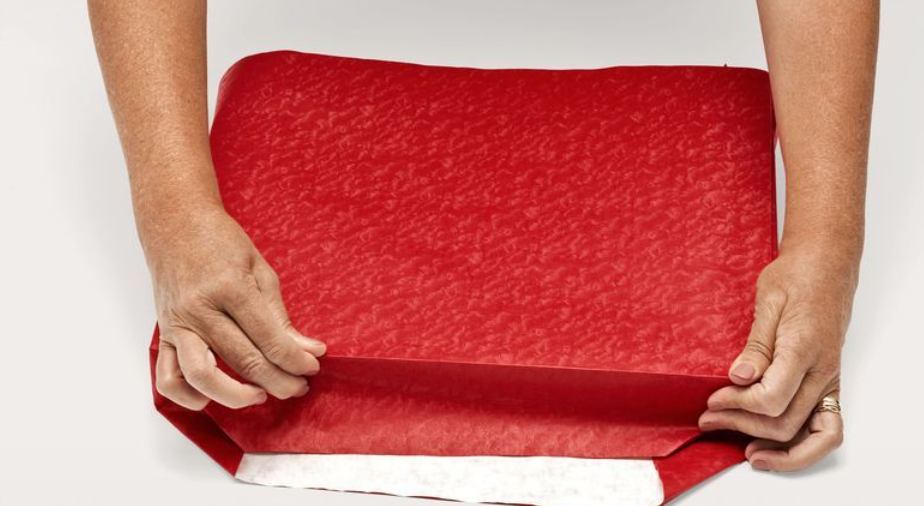
Step 5: Fold The Gift
As you continue working with the open ends, proceed by folding down the remaining end to form a second triangular flap.
The objective here is to achieve a fold that gently overlaps the first flap, resulting in a seamless and uniform finish.
Secure this second flap in place with tape, giving utmost attention to ensuring the folds are sharp, crisp, and clean.
This step plays a pivotal role in the overall presentation, contributing significantly to the preservation of a neat and polished appearance that will undoubtedly impress the recipient.
Step 6: Remove Extra Paper
Upon the successful completion of both triangular flaps, the subsequent phase involves giving your gift wrap a thoroughly polished edge.
With a pair of sharp scissors in hand, take great care in the process of trimming any excess paper from the flaps.
Your cuts must be both precise and perfectly straight, enabling the creation of a well-defined, professional-looking edge.
This meticulous attention to detail brings about a heightened level of sophistication, enhancing the overall visual presentation of your gift.
It not only produces a visually impressive result but also underscores the thoughtfulness and effort you’ve put into crafting a beautifully wrapped Christmas gift, destined to be both appreciated and treasured by the fortunate recipient.
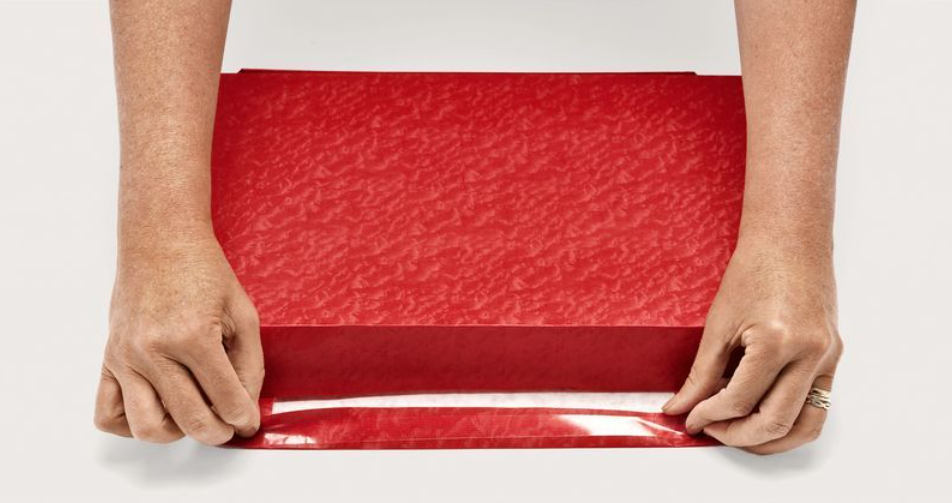
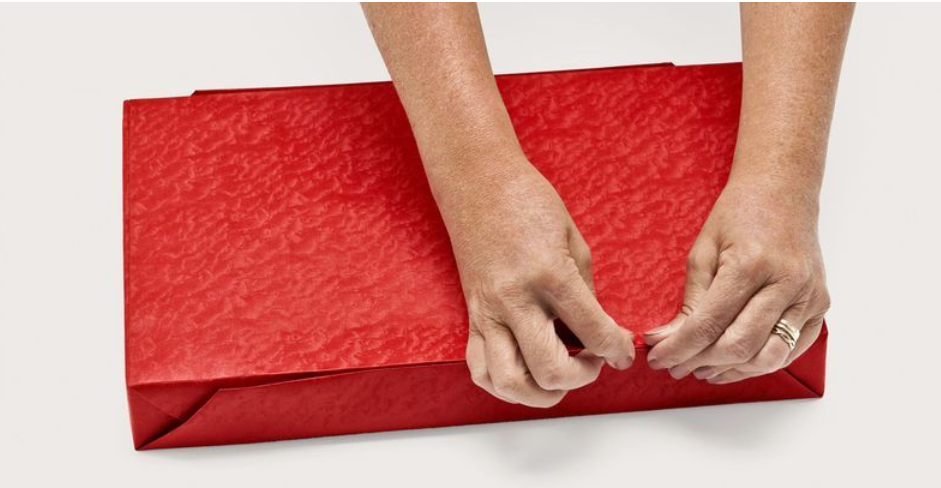
Step 7: Conceal Sides
To achieve a polished and refined result, it is essential to replicate the sequence of actions delineated in steps four through six on the remaining open end of the box.
By consistently following these steps, you ensure that every side of the box receives the same level of meticulous attention.
As you proceed, engage your pinched thumb and forefinger to delicately run along the edges, expertly crafting sharp and defined lines that bestow the box with a professional and well-finished appearance.
This method not only enhances the visual aesthetics but also ensures the structural integrity of the box, guaranteeing a comprehensive and high-quality result that reflects precision and craftsmanship in the final product.
Step 8: Incorporate Ribbon
As the main body of your gift is now securely wrapped, and both ends have been meticulously finished, it’s time to enhance the overall presentation with the addition of a ribbon or twine.
When selecting your ribbon, it’s essential to consider how it complements both the chosen wrapping paper and the personal style of the recipient.
The color, texture, and design of the ribbon should harmonize with the gift’s theme and the recipient’s preferences, enhancing the overall aesthetic.
Additionally, ensure you have a length of ribbon that comfortably wraps around the gift, allowing for a graceful and well-proportioned finish that accentuates the care and thought you’ve invested in your gift-wrapping endeavor.
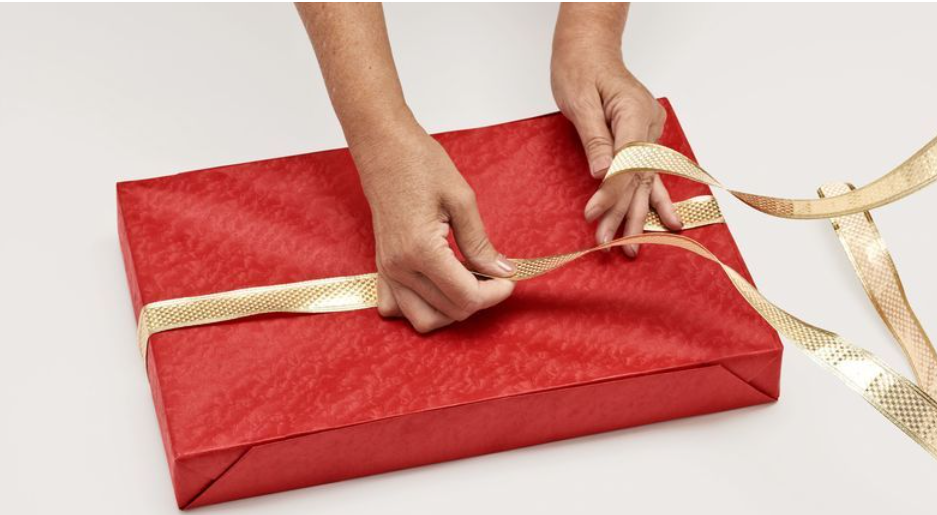
Step 9: Ensure Ribbons Are Threaded
Mastering the ribbon application is a pivotal step in your gift-wrapping journey.
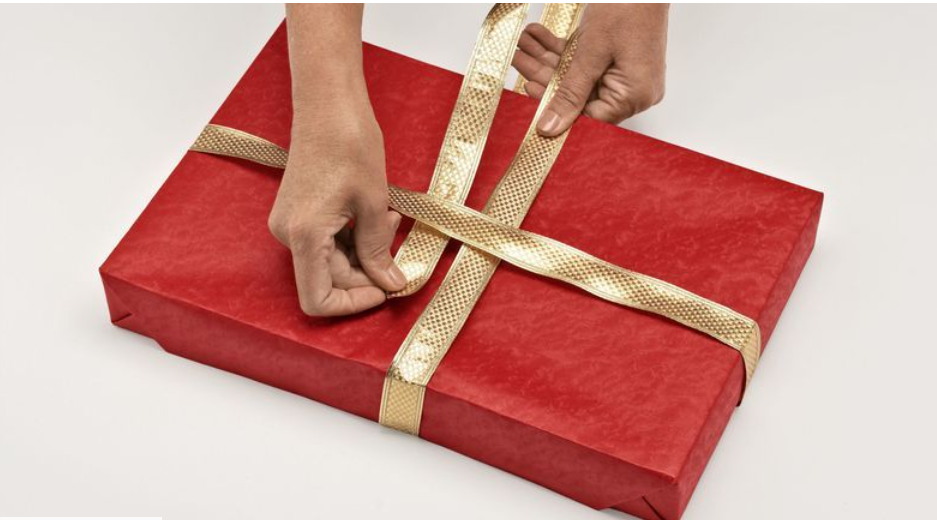
Start by positioning your chosen ribbon or twine underneath the gift, ensuring that there are even lengths extending on either side.
Converge the ribbon ends at the top of the gift, creating a clean cross over the gift’s surface. As you do so, ensure a balanced and visually pleasing appearance.
Drawing the ribbon ends together, maintain just the right amount of tension to secure the wrapping paper while achieving a polished presentation.
The level of tautness in the ribbon is pivotal, as it contributes to the creation of a secure, professional, and polished final bow—the crowning jewel of your impeccably wrapped Christmas gift.
This final touch enhances the overall presentation, making it a memorable and cherished gift to give and receive during the holiday season.
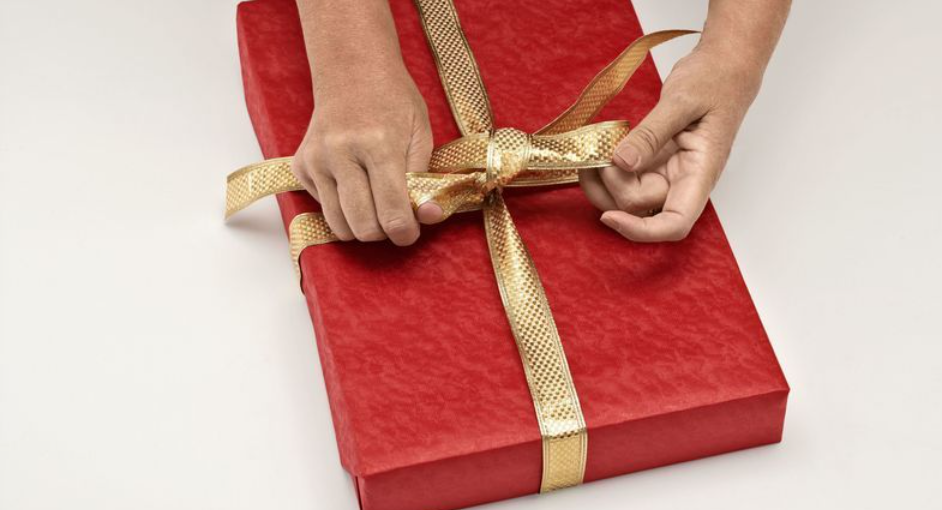
Step 10: Try A Double Knot
To guarantee the ribbon’s secure placement, take a moment to craft a double knot at the top of your gift.
This double knot serves a dual purpose: it not only keeps the ribbon steadfastly attached but also serves as a safeguard against any potential slippage or unraveling, ensuring your presentation remains pristine.
If you’re inclined to infuse an extra dose of elegance, this is the opportune moment to consider tying a classic bow.
The addition of a well-structured bow at this stage heightens the overall visual appeal of your gift, offering an extra layer of sophistication and charm that demonstrates your attention to detail and commitment to making your presentation as captivating as the thoughtfully chosen gift inside.
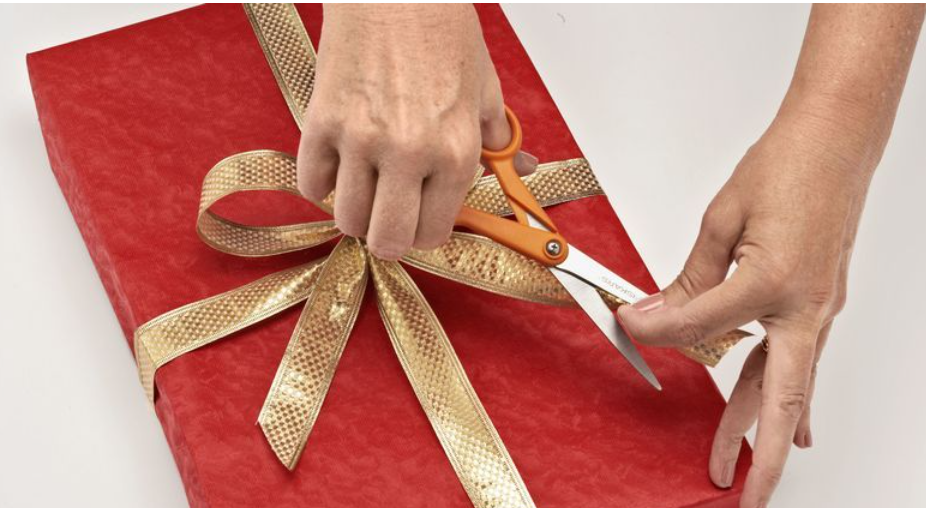
Step 11: Slice The Ends
To achieve a polished and sophisticated finish, focus on the delicate task of trimming the ribbon ends.
When wielding the scissors, ensure they’re slightly angled, a technique that not only yields a clean and elegant appearance but also minimizes the potential for fraying.
The length of the ribbon ends should be dictated by your taste and the style you intend to create.
Whether you prefer shorter, tidier ends for a minimalist look or longer, graceful tails that evoke a sense of luxury and extravagance, this final touch allows you to personalize your gift’s presentation and convey a message of refinement and attention to detail.
Your choice of ribbon length serves as the crowning touch to an already beautifully wrapped Christmas gift.
Step 12: Completed!
After diligently following each of these intricate steps, you’ve mastered the art of wrapping your Christmas gift like a seasoned pro!
Your beautifully presented gift now boasts expertly folded corners, securely sealed flaps, and a charming ribbon or bow that adds an extra layer of visual appeal.
The thought and effort put into this presentation are bound to elevate the joy of gift-giving during the holiday season, leaving a lasting and unforgettable impression on the recipient.
Your attention to detail and creativity will undoubtedly be appreciated and cherished by your loved ones, making the act of unwrapping a true delight.
Best Christmas Gift Wrapping Ideas To Try Out
Gift wrapping isn’t just a means to conceal presents; it’s a delightful and creative way to enhance the joy of gift-giving during the holiday season.
If you’re eager to elevate your gift-wrapping game and make your presents truly special, explore these imaginative and enchanting Christmas gift-wrapping ideas that will surely captivate your recipients.
1. Miniature Winter Scene Idea
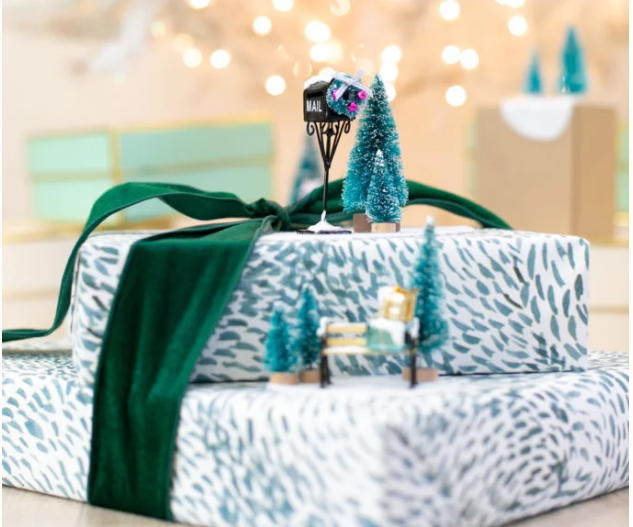
This enchanting idea allows you to create a winter wonderland on top of your gift, and it’s perfect for evoking the magic of the season.
Begin with white or silver wrapping paper to set the stage for your snowy landscape. The key to this concept lies in the details.
Add miniature figurines like tiny evergreen trees, deer, or snowmen to construct your winter tableau.
To complete the look, gently sprinkle a bit of fake snow over the scene. The result is a gift that not only conceals a surprise but also serves as a beautiful miniature winter diorama, promising joy and wonder the moment it’s revealed.
2. Earring Tree and Necklace Wreath Idea
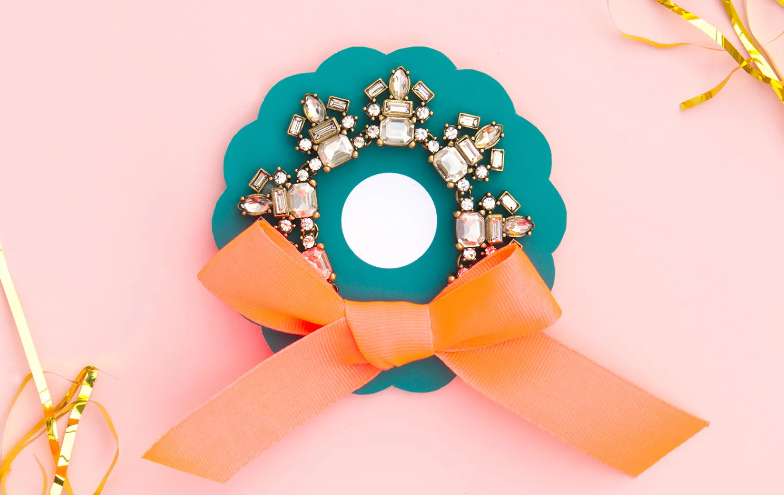
For small and delicate jewelry gifts, consider this innovative idea that combines wrapping and presentation into one delightful package.
Start by attaching tiny hooks or adhesive tabs directly to your wrapping paper. This allows you to hang earrings, making them part of the presentation elegantly.
Alternatively, create small holes through which you can thread a ribbon to display necklaces. The final result is a gift that doubles as a piece of festive decor, offering a beautiful preview of the jewelry contained within.
This approach not only makes the gift itself more memorable but also adds a thoughtful and decorative touch.
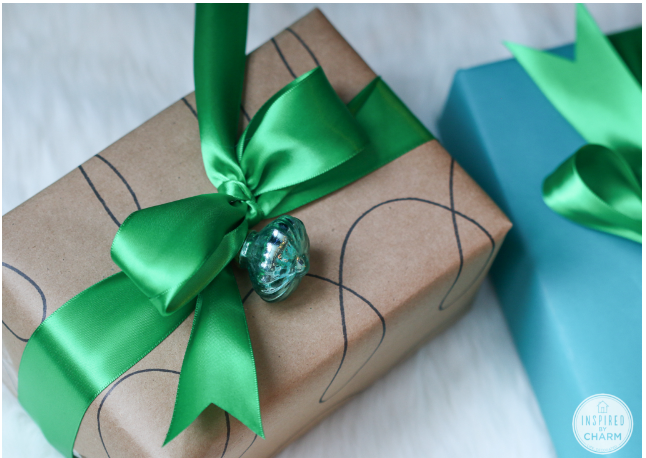
3. Polka Dot Idea

Polka dots are a classic and versatile pattern that always stays in style. They bring a touch of playfulness and elegance to your gift wrapping.
To achieve this charming look, choose a wrapping paper with a solid background, and then use a contrasting color or metallic marker to create evenly spaced polka dots.
The result is an eye-catching pattern that’s simple yet chic, making your gift stand out with its timeless charm.
Polka dots work wonderfully for a wide range of recipients and occasions, adding a touch of whimsy and sophistication to your presents.
4. Cardboard Box Snowman Idea
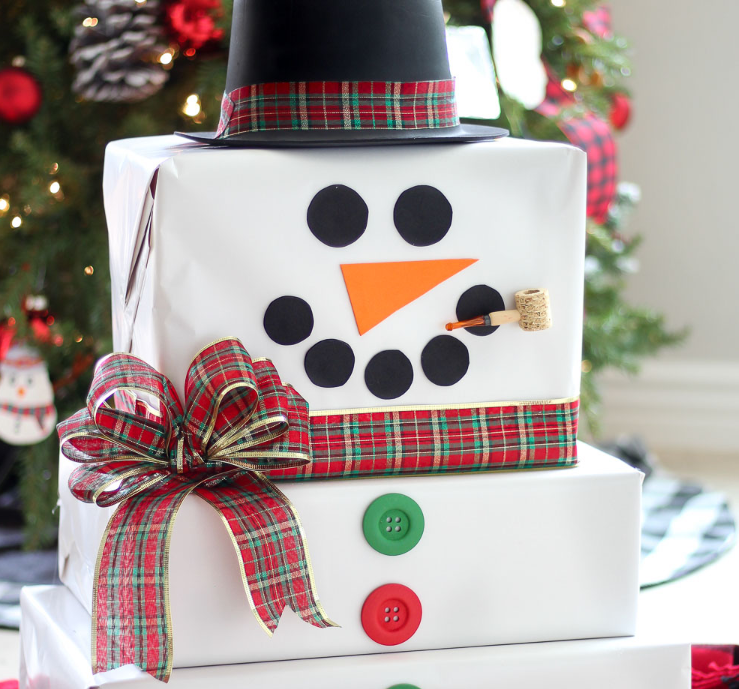
Why stick with traditional wrapping paper when you can create a memorable and decorative gift by thinking outside the box—literally?
This idea involves using cardboard boxes to craft an adorable snowman gift presentation. Stack three boxes in descending sizes to create the body of your snowman.
Then, decorate the boxes with a snowman face, buttons, and a hat. This unique wrapping idea not only conceals the gift but also becomes a festive holiday decoration in its own right.
It’s a thoughtful and whimsical way to present your gift, and the snowman theme will surely bring smiles and holiday cheer.
5. Bubblegum Gift Wrap Idea
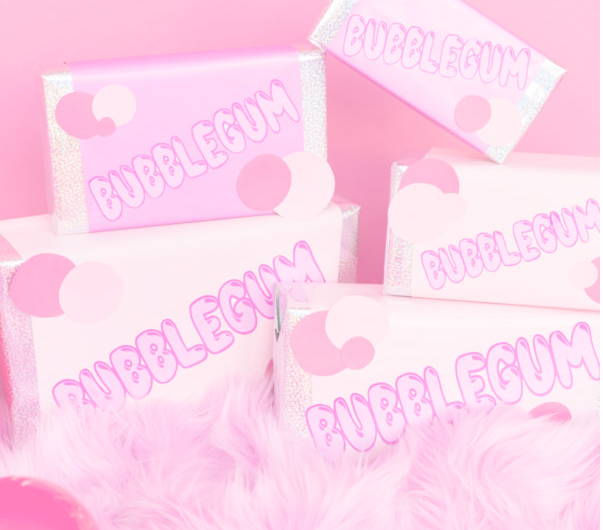
If you want your gifts to be vibrant and playful, consider this sweet and colorful idea. Transparent wrapping paper sets the stage for this unique presentation.
To mimic the look of bubblegum, attach multi-colored pom-poms in various sizes directly to the wrapping paper.
This creates the illusion of gumballs or bubbles, adding a fun and lively design to your gifts. It’s a perfect choice for kids or anyone young at heart and will surely add a pop of color and delight to the holiday season.
6. Mini Christmas Tree Gift Wrapping Idea
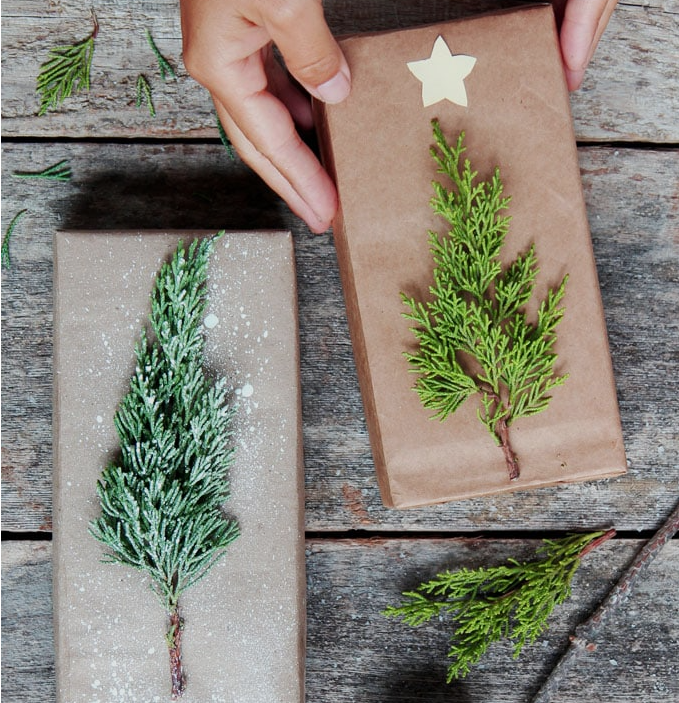
Envision your gift becoming a delightful surprise with the addition of a miniature Christmas tree as an integral part of the presentation.
This charming concept entails affixing a petite artificial tree to the wrapped gift box, adorned with tiny ornaments, glistening tinsel, and a radiant star atop its branches.
The result is a presentation that’s not unique but also exudes a festive charm, leaving your recipient genuinely awestruck.
Beyond its immediate appeal, this charming tree carries a lasting enchantment, embodying the holiday spirit in tangible form.
Its enduring presence ensures it becomes a cherished keepsake, gracing seasonal decorations for years to come, elevating your gift-giving to a level of thoughtfulness and warmth that resonates with the essence of the holiday season.
7. Photo Gift Tag Idea
Elevate the personal connection with your gifts through this touching idea. Instead of relying on conventional paper gift tags, incorporate a beloved photograph of the recipient or a shared cherished memory.
Be it a snapshot of a special occasion or an intimate, candid moment, this notion radiates a profound sense of thoughtfulness and a deeply personal connection.
It serves as a splendid method to ensure that your gift is perceived as one-of-a-kind and laden with significance, leaving your loved ones with an enduring, heartfelt, and unforgettable keepsake that will be treasured for years to come.
Conclusion
This holiday season, GNN offers two exquisite products that make for heartwarming gifts for your loved ones.
Our personalized family tree candle holders serve as a symbol of the enduring bond shared among family members, casting a warm and inviting glow during festive gatherings.
Additionally, our custom family Christmas ornaments add a personal touch to the holiday decorations, creating cherished memories that can be hung on the tree year after year.
We invite you to explore these meaningful offerings at the GNN jewelry store, where you’ll discover a wide range of gifts that celebrate the spirit of togetherness and love.
Make this Christmas season truly special by choosing these heartfelt presents and delight your family and friends with the gift of lasting memories.
Visit us today to discover even more thoughtful gift ideas that will bring joy and warmth to your holiday celebrations.