
Christmas is approaching, and each amateur and expert (including yourself) is attempting to produce the finest cookies for their relatives.
However, few know how to bake an outstanding cookie to capture people’s eyes.
If you don’t know about designing and making cookies, there is always a new day! At last, a glimpse of light in the tunnel!
It’s good that you finally found your well-lit tunnel, and this is by far your best companion as you follow through until you bake and decorate a Christmas cookie that shouts the festiveness.
Step-by-Step Process On How to Decorate Christmas Cookies
Making the best cookie requires you to have the right baking system, the right ingredients, and attention.
Fortunately, this section has everything you need to make the perfect cookie for your loved ones.
1. Preparing for Cookie Decoration
Christmas is the best cookie time, so you must make the best for your family and friends.
You might even get an extra Christmas gift for your baking skills. This is what you need to know:
Selecting the Right Cookie Recipe
Picking the right cookie recipe is not a walk in the park. It requires time and understanding of the people you will make them for. Take a look at these recipes:
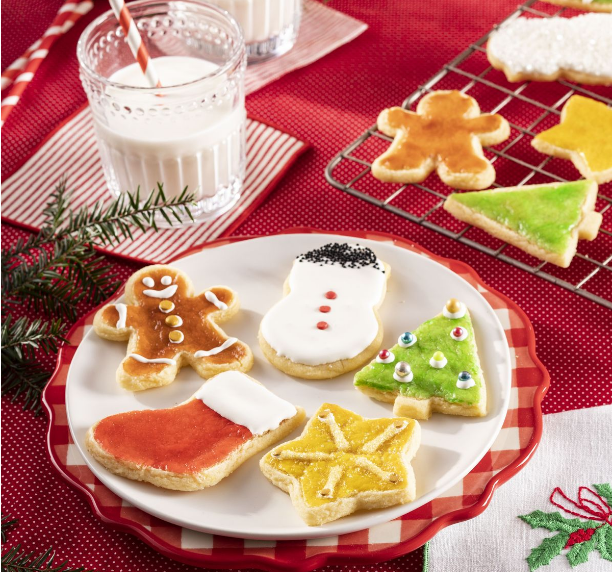
1. Traditional sugar cookies.
As for the Christmas treats, the traditional sugar cookie remains a classic. It’s all about their simplicity; their sugar fades into your tongue.
They feature a rich but subtle taste, accommodating various complex decorations and colored fillings.
2. Gingerbread cookies.
Gingerbread adds a colorful feel to Christmas and a taste that everybody will enjoy if you have one of those recipes to cook great things.
This is especially true as these cookies are usually flavorful with cinnamon, ginger, and clove.
Thus, they are both mouth-watering and appealing to our noses. These cookies have a great crunch, making them ideal for intricate decorations and icing patterns.
3. Other suitable cookie recipes.
There are all kinds of cookies from all over the world you can choose from that everyone will enjoy. They’re delicious, such as chocolate cookies, one of people’s favorites.
They exist in many types, making your assortment interesting and tasty. It is exciting whenever one tries something new in baking.
Baking Tips for Perfect Cookies
Baking is not accessible if you’re trying to perfect your culinary skills, but you can make it simpler if you know the right things and ingredients to use.
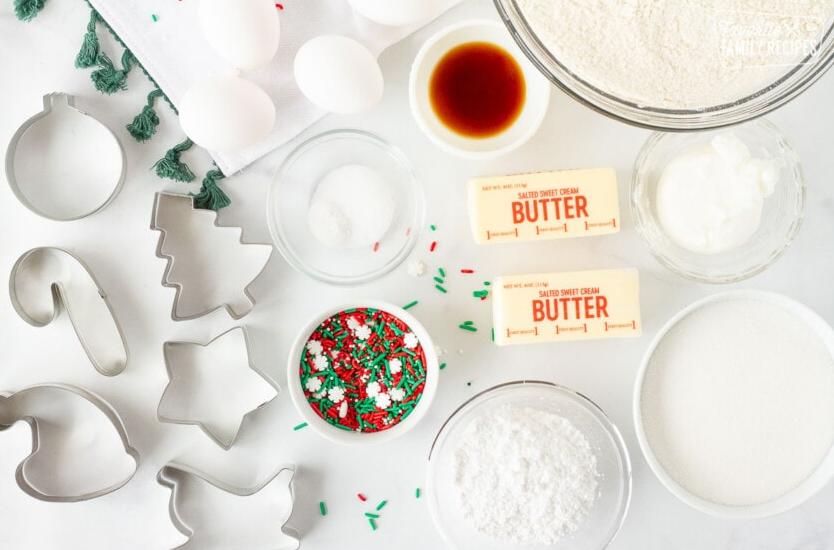
1. Ingredients and measurements.
Perfecting a single batch of cookies starts by choosing the right ingredients and remembering to measure everything precisely. Use fresh and good-quality ingredients for great taste and texture.
Ensure you have the correct quantity of flour, good-quality butter, and fresh eggs. Careful use of a scale while measuring sugar baking powder is necessary.
When making cookies, consistency of measurement between batches is critical so that each cookie will be an aesthetic delight.
2. Baking temperature and time.
When baking the tastiest cookies, go through the temperatures and adjust the correct one for your oven.
Be sure to pre-heat the oven before you place the cookie dough.
Check your cookies as they cook through and adjust according to their thickness. As a result, it affords their attention and comes out fine. Have patience; allow it to cool before consuming it.
3. Cooling and preparation for decoration.
After baking the cookies, allow them to have an appropriate cooling period before enjoying them. They get better in terms of taste and texture by cooling.
However, place it into a wire cooling rack for even cooling. Therefore, these items must be cooked and take time, but be sure they will make them soft or crunchy.
Allow them to cool down before decorating them. Ensure that, after cooling down, they retain the entire temperature before they are iced or decorated for serving so that they do not melt or ruin their outlook.
2. Gathering Decorating Supplies

Decoration makes a fantastic cookie stand out from a regular baked option. It’s a magical way to make someone want to try your cookie, and you need to nail it.
Types of Icing
Icing is an essential part of making cookies and requires your attention to the max. It also requires you to pick the right option based on the cookie you’re making.
1. Royal icing.
For decorated or fancy-designed cookies, a royal icing will be appropriate. The egg white is mixed with powdered sugar and sometimes with lemon juice.
This substance dried out into a solid, smoother state. Due to this, it is also perfect for engraving fine lines to create detailed patterns, piped designs, and beautiful intricately designed pieces.
It can be used on a small or even more significant area with accuracy for the smaller spot and smoothness for the larger one.
2. Buttercream frosting.
Cookies can be decorated with buttercream frosting, which is tasty and attractive. The cookies are soft and contain butter, powdered sugar, and vanilla extract (creamy and rich).
While it does not set as completely as royal icing, this is good since it allows for more fun and enjoyment when embellishing your creations.
3. Other alternatives.
Exploring different icing types available for decorating cookies reveals multiple options to use as one decorates.
Cream cheese, for instance, provides that sweet, tangy note, and milk or juicy glaze is much lighter for refreshments. Fondant is technically not icing but can produce an evened-out and well-polished finished layer in your cookies.
Venturing into these alternatives broadens your decoration repertoire, enabling the inclusion of differing tastes and touches in your yuletide undertakings.
Coloring Your Icing
Another essential part of making the best cookie is coloring your icing effectively. This is what you need to know about this process:
1. Food coloring types.
You can use various food-colored products under your creative control to color your icing. Food dye liquid is easily accessible and comes in small bottle droppers for convenience.
The first type is gelled or pasted but concentrated food coloring, bringing brighter tints into your icing without changing its state.
Another available option is powdered food coloring; it is dustable over dried icing and can even be dissolved for the watercolor effect.
Whatever kind you go for, make sure it is marked “for icing” so that your showpiece does not get messed up by the taste and texture of ice cream.
2. Mixing custom colors.
Taking your cookie decoration up a notch means going the extra mile in colors and getting down to specific hues.
Use different proportions of primary colors to produce suitable shades. For example, when we mix red and blue, we get purple; when we mix red and yellow, we get orange.
Remember, a little colour goes a long way, so add a little to achieve the desired tone. Be experimental about your custom color recipes to have a uniform effect on your parties.
Additional Decorative Elements
You’ll need additional decorative ingredients to make the perfect cookie everyone admires. That way, the cookie looks more appealing and fun to eat.
1. Sprinkles and edible glitter.
Sprinkles and edible glitter act as fun accessories, giving body to the flavors and some shine to the cookie creations.
These may include classic rainbow sprinkles or metallic or themed shapes. By applying the spray on your cookies after icing, you can ensure they stick.
Edible glitters come in different colors and shapes and sparkle even more of a magical effect on any decorated creation.
2. Fondant decorations.
One can create ornate decorations with an immaculate and glossy feel using fondant. Flatten the fondant and then cut it into appropriate sizes of letter shapes, and even spread it all over the cookie for perfection in appearance.
Its flexibility makes it easy for the carver to create intricately detailed snowflakes or festive characters.
The fondant decorations will create an air of classiness, turning your cookies into fine edible art.
3. Edible markers and paints.
Edible markers and paints offer more detailed approaches that are appropriate, especially for added intricate details on your cookies.
They enable direct drawing onto the icing surface using any marking instrument like a paintbrush, pen, or pencil.
Various edible markers have been created, allowing one to write any message or even complex pictures using the edible ink.
You can also use edible paints that contain food color suspended in alcohol or extract. This resembles watercolors, allowing you to work with soft colors and graduations.
3. Basic Decorating Techniques
There is something special about decorating your cookie that makes it more enticing to eat. These are the basic techniques you need in your culinary book:
Flooding
Ensure that the piping tip is placed at least three-eighths of an inch away from the edge of the cookie.
In just a few seconds, that area will be occupied by icing; hence, if placed near the edges, it will create a mess.
Press lightly on the piping bag and let the icing trickle out. To do this, press gently against the cookie when it first touches the tip of the pastry bag, then lift slowly about an inch high, still suspended by a thin stream of royal icing.
Consider icing like a string you must lay out when outlining a cookie. Keep the piping tip well over the cookie to have ample space to guide the icing as you set it.
Flocking
Polka dots add the most visual interest using the least effort possible. In this case, make a circle with icing of your choice around the cookie.
The icing must be made of a tertiary-colored icing with the endpoint almost parallel at the top of the ice surface.
Press it lightly until the icing comes out slowly, but increase the pressure to form the bigger blod. Lastly, unwind and grab the mouth of the purse upwards while pulling up straight. Within several minutes, the crest will disappear completely.
Repeat this with more or fewer dots or different tones, or design anything as complicated as possible and insert dots inside other dots.
Hearts
Use a plain colored frosting to create a stencil on your cookie that matches your pattern and then fill in around it afterward.
Place one primary-colored dot in each half of the cookie and follow the previous directions for polka-dotted cookies using a secondary color. Then, slide a toothpick through every dot following a pattern (up to down).
Go through its middle to create a traditional heart shape, or divide it diagonally for something more playful.
When drawing, you can drag the toothpick through a few dots, making it look like a tail, or pick the toothpick and clean it after making each dot.
Color-Blocking
All this is just a simple version of flooding aimed at small cookie pieces. This is a beautiful method of getting alternating bars of red and white stripes for a candy stick, the different shapes that comprise Santa’s suit, or the form of a snowman’s nose, body, and head.
Regardless of what kind of holiday assortment you dream up, focusing on a few colors and basic techniques will free up your time and energy to spend more time on the fun stuff.
Polka Dots
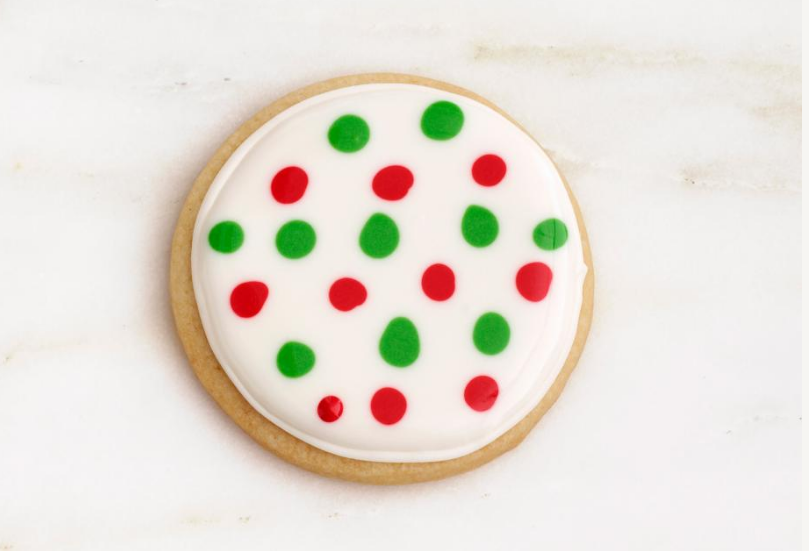
Polka dots add the most visual interest with the least amount of effort. Simply draw around the cookie with your chosen color of icing.
Use a tertiary colored icing, and hold its end almost parallel to the top of the iced surface.
Press it until the icing starts to flow, but continue the press to create the larger dot. Finally, untwist and take hold of the edge of the bag and lift it straight up. Within minutes, the crest will subside before totally vanishing.
Just repeat it with more dots or use different shades, make designs as complicated as you need them, nestle the dots into other dots, or put rings of color next to each other.
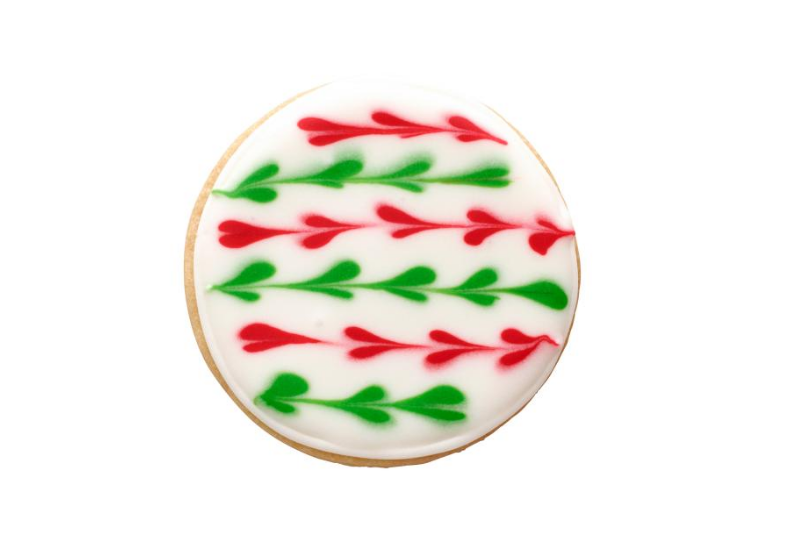
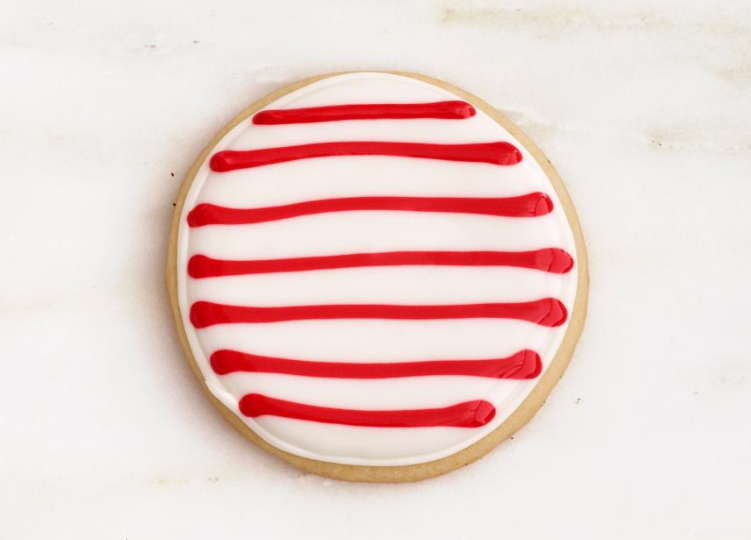
Zigzags
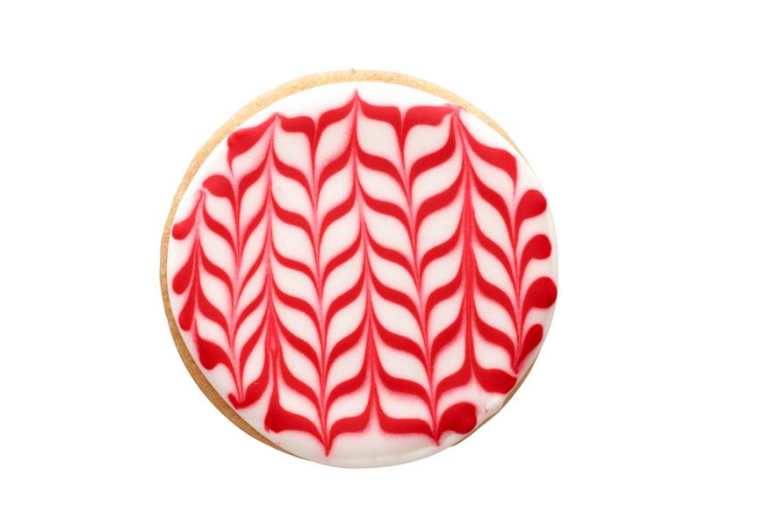
As you did with the iced hearts, they create a flooded base of icing using another different colored icing and some magic involving a toothpick and white icing.
Pipelines pass over a flooded cookie in one go, beginning with uniform yet mild squeezing.
Finally, scrape the toothpick across the cookie vertically, perpendicularly intersecting the lines.
Towards the end, wipe clean the toothpick, slide it to the side of it, and do bottom to up again. Just keep going until you have crossed that particular piece of cookie.
Initially, it might look like a definite “gap” where the icing broke off, but this will disappear with time.
This same technique could also be applied on a smooth arc of a toothpick, for instance, to achieve the impression of a curve.
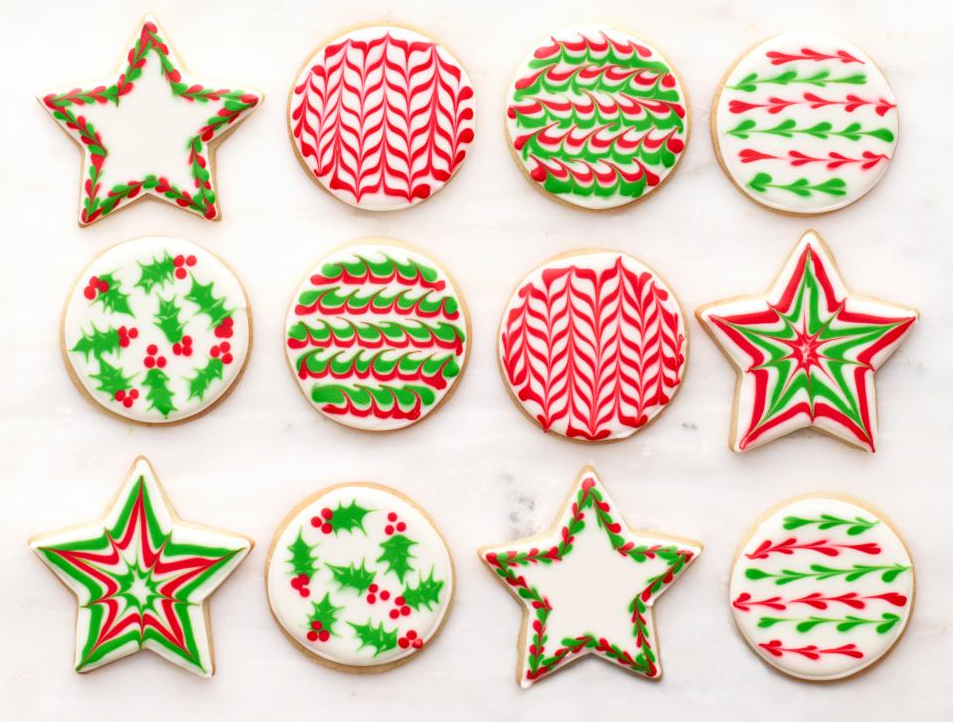
10 Best Christmas Cookie Decorating Ideas
Now that you know how to bake the best cookies, it’s time to learn some of the golden cookies you can make for your family.
Here are some of them:
1. Pinwheel Cookies
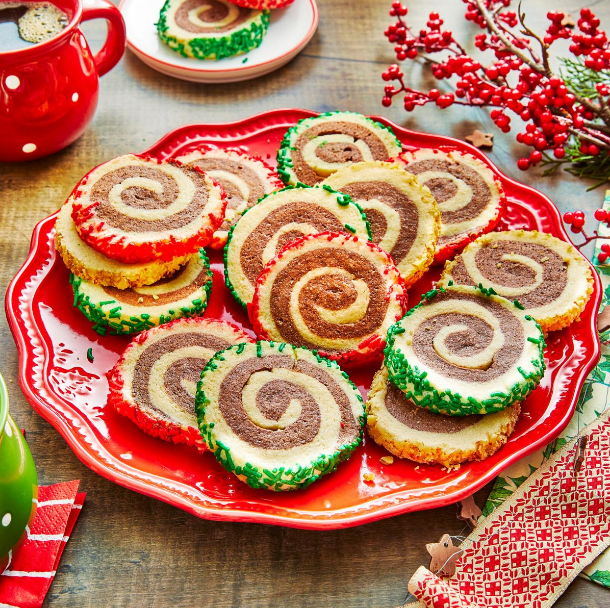
Making Pinwheel Cookies artwork entails winding different dough colors to form a beautiful pattern that unravels into an exquisite work of culinary art once cut out and served in slices.
It’s more than baking and involves a fantastic sensation of taste while adding a chic touch to your dinner table for the holidays.
Every stage, from the first stages of mixing the ingredients to the careful shaping and the slow baking, expresses talent, art, and hard work.
2. Candy Cane Cookies
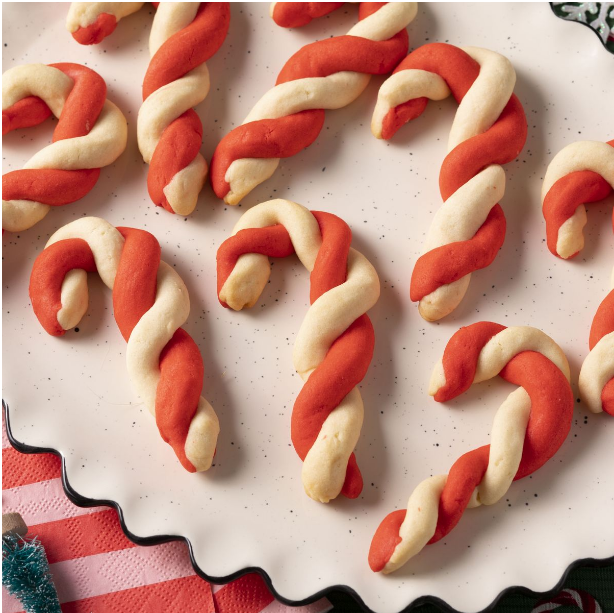
Baking is turned into a joyous act of sculpting when making Candy Cane Cookies for you and your family this holiday.
Exquisite twists of red and white dough create treats for cookie trays and a festive wonder.
Peppermint adds refreshment to every bite, making it an amalgamation of tradition and Christmas. Making these cookies is not simply about cooking, culture, and fun over the holidays.
3. Salted Caramel Cookies
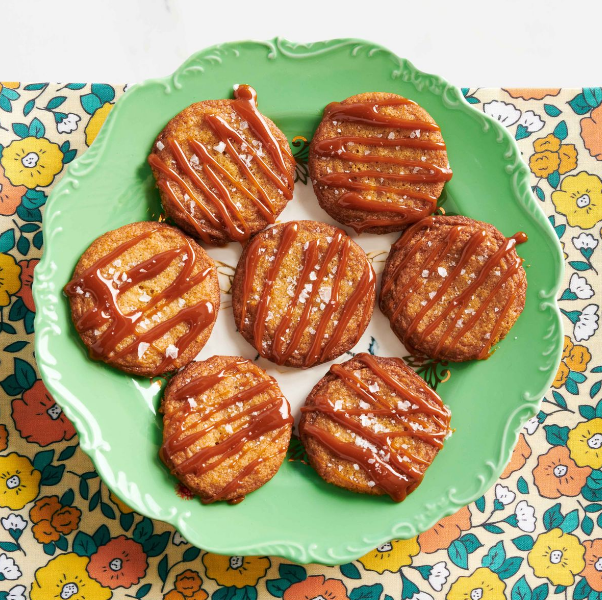
Salted Caramel Cookies will take you to another level of refined sweetness. You should drizzle the tasty caramel on the handmade sugar or chocolate biscuits to add an art feel to your cooking activities.
It’s not an ordinary cookie but a chocolate delicacy, a unique combination of sweetness and deliciousness you want to enjoy every moment.
This cookie is an adventure in flavors; picking only quality ingredients and then using them in this manner ensures that every cookie becomes an edible artwork.
4. Mexican Wedding Cookies
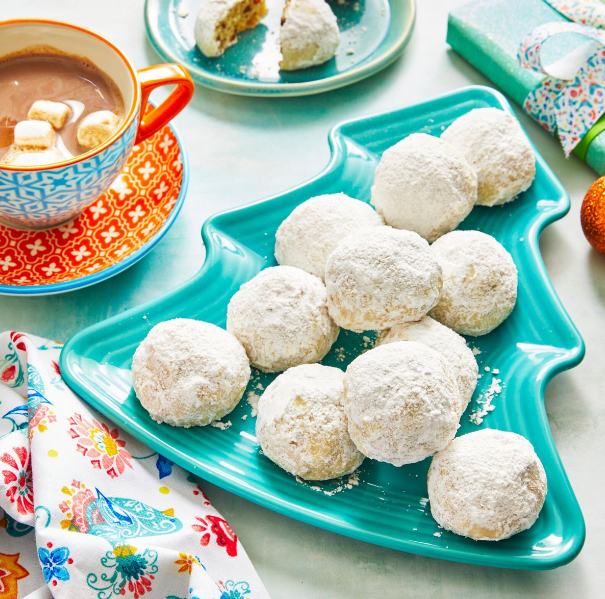
These delicious Mexican Wedding Cookies, butter balls coated in powdered sugar, will make your mouth water with their taste.
It goes beyond luxury; it’s a delicacy, feast taste, and heritage.
Art is transformed into edible in the agonizing process of molding, gilding, and the birth of an object that rises out of a biscuit.
5. Pumpkin Sugar Cookies

The Pumpkin Sugar Cookies, spiced with warm spices and taking unique shapes, are not only holiday sweets but also a cultural manifestation of Indian fall.
You’re not just eating a cookie as you enjoy these pleasures but the season itself.
Creating such cookies involves a sensory experience, starting with the rustic fragrances of pumpkin and spices and going down to delicate decorations that capture the essence of fall.
6. Chocolate Candy Cane Cookies
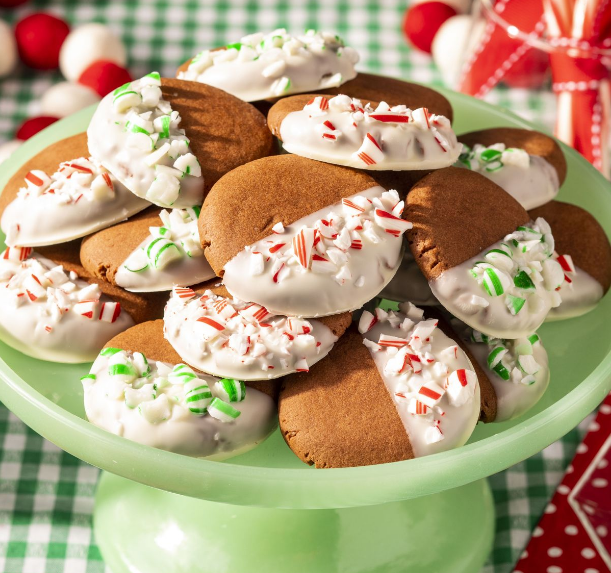
Chocolate Candy Cane Cookies embody decadence differently, merging chocolate’s richness and peppermint’s holiday freshness.
The drizzled melted chocolate and carefully shaped candy cane cookies are no less than a visual masterpiece with combined bites of classic tastes.
As for the making process of these cookies, it’s a case of balancing taste and texture – from mellow chocolate to cool peppermint.
7. Spicy Molasses Cookies
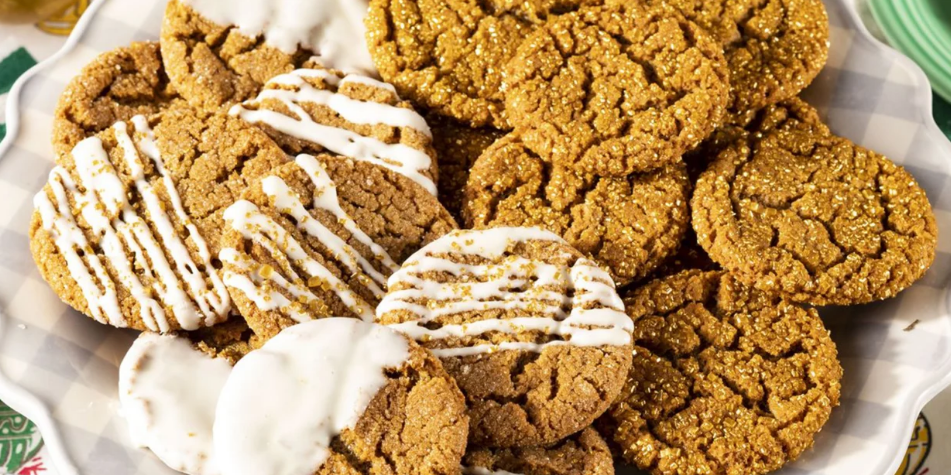
Use the aromatic creation of Spicy Molasses Cookies to infuse some warmth and spice into your holiday cookie collection.
Combining the smooth flavor and soft and rough texture with an artistic mix of herbs and spices induces an amiable feeling.
These cookies become part of the feast where their preparation is a ritual; the aromatic spices are meticulously weighed and combined to construct a score of warmth and profundity.
8. No-Bake Chocolate Oatmeal Cookies
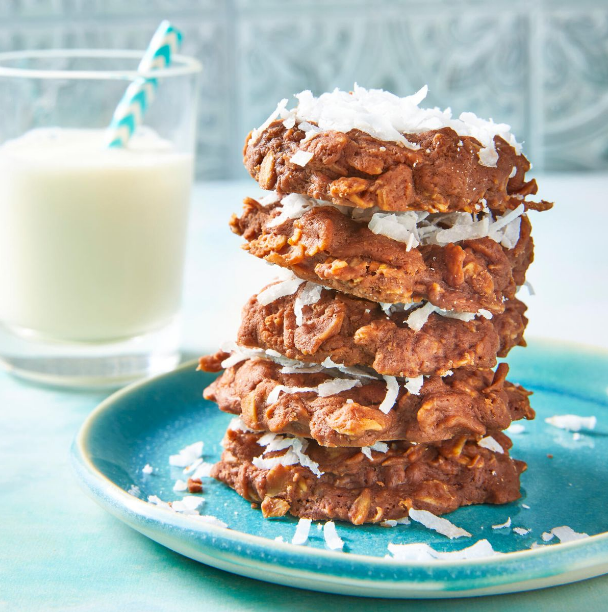
Include No-Bake Chocolate Oatmeal Cookies in your holiday lineup, as they will offer you a fuss-free treat.
These cookies have a fudgy consistency and an inner taste of nuts that transcend their brief deliciousness – they offer layers of flavor and complexity within their straightforward simplicity.
The creative process of making these cookies explores textures, starting with velvety-soft melting chocolate and ending with satisfactory crunch-sounding oats and nuts.
9. Ree’s Favorite Christmas Cookies
Ree’s Favorite Christmas Cookies is not only a dish but also a taste journey, which was produced with love and skill.
Some treats are available in traditional signature cowboy cookies or festive variations specially offered during holidays, including exclusive ones at Starbucks.
Recreating Ree’s favorites is a journey into the heart of this woman’s kitchen, where she creates an atmosphere of homey comfort and festive celebrations.
10. Peanut Butter Blossoms
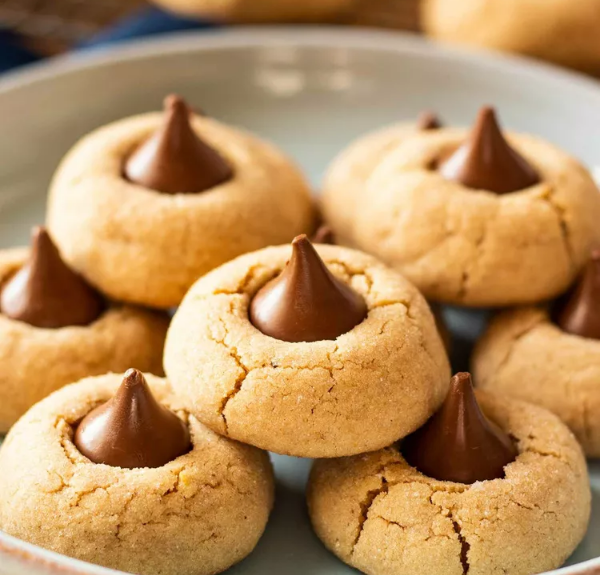
Finish off a holiday season chock-full of cookie decorating with an evergreen favorite – Peanut Butter Blossoms.
Holiday nostalgia is combined here with chocolate’s nutty richness and sweetness harmony. Every bite makes for an expedition across flavors, the ultimate holiday-season indulgence. However, it takes more than baking these cookies.
They connect with successive generations who share their childhood experiences through the flavors.
Tips for Decorating with Children
Decorating cookies is a Christmas special that should always be celebrated to keep the holiday traditions going.
But what if you could do it with your kids?
If this sounds like a great idea to you, then use these tips to make it the most exciting and beautiful experience of your life:
- Plan Ahead: Ensure you have all your resources before embarking on the decorating adventure. Baked cookies, different kinds of icing, sprinkles, edible decorations, and other tools utilized in applying the decorations, to mention a few.
- Bake in Advance: Bake the cookies ahead of time to improve your decorating experience. Kids may find the cooking procedure less entertaining. Therefore, it is easier for them to concentrate on the fun part, decoration.
- Have a Decorating Station: Ensure you set up a separate station and enough space for each child. Put down disposable tablecloths or placemats that will be easy to clean up later.
- Offer a Variety of Decorations: Offer a variety of colorful icing, sprinkles, edible glitter, and other adornments. This offers diversity for the children to be creative by allowing them to give various colors and textures to their cookies.
- Accept the Mess: Cookie decoration is an interactive art; messiness comes with enjoyment. Spread the mess around, wear aprons or put on the old shirt, and put newspapers or disposable tablecloth beneath.
- Keep it Simple: This type of diversity in the decoration is better, but try to make this process as simple as possible. It has been established that children are overwhelmed by the numerous choices available.
- Encourage Creativity: Nurture creativity in children, making them open up freely. Allow them to try various shades and styles and guide their work designs moderately.
Conclusion
Cookies are exceptional if you’re a Christmas enthusiast who enjoys the festive season’s excitement.
And making them is something special that can bring families and friends together to enjoy the beautiful moment.
This festive season is your time to use this guide and make lasting memories with your loved one by baking some of the best cookies using this guide.
While you can use this guide to your advantage, ensure you add your personal touch to make the baking process more exciting.